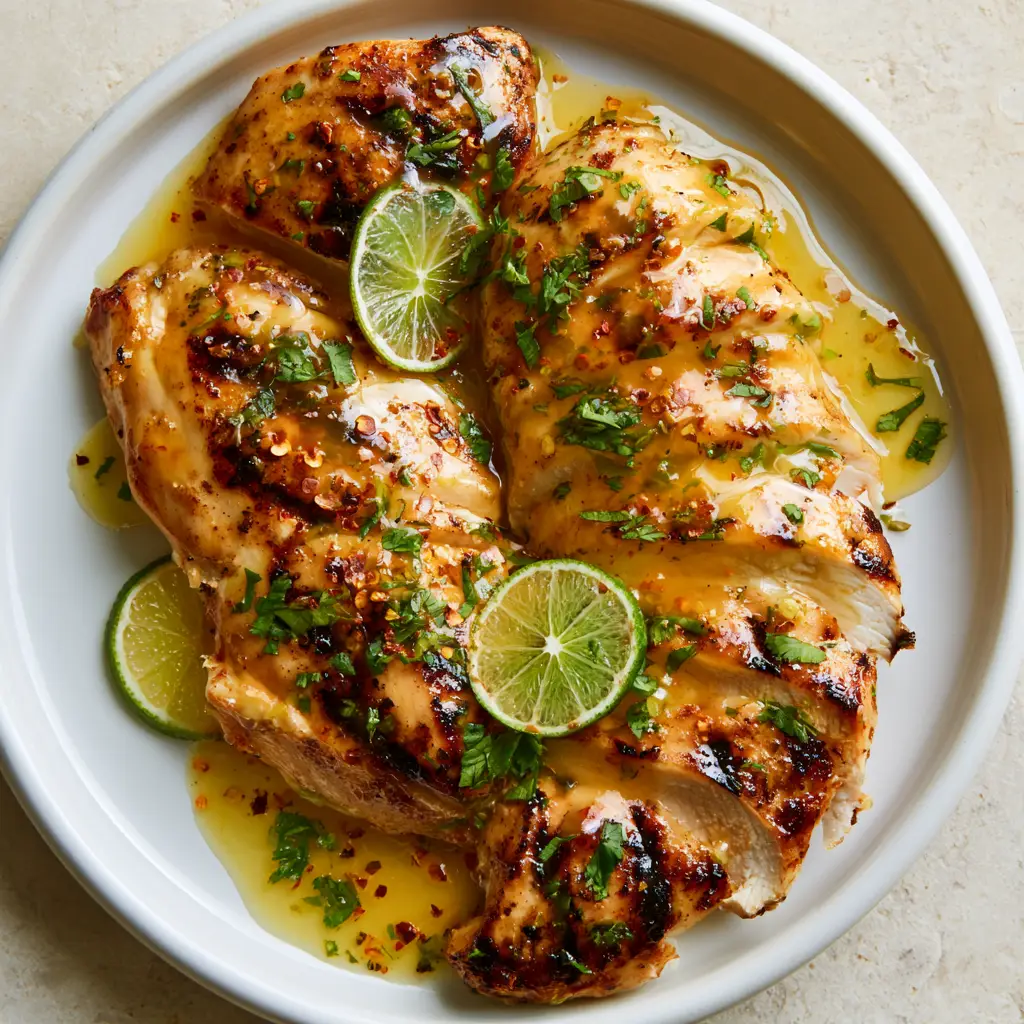
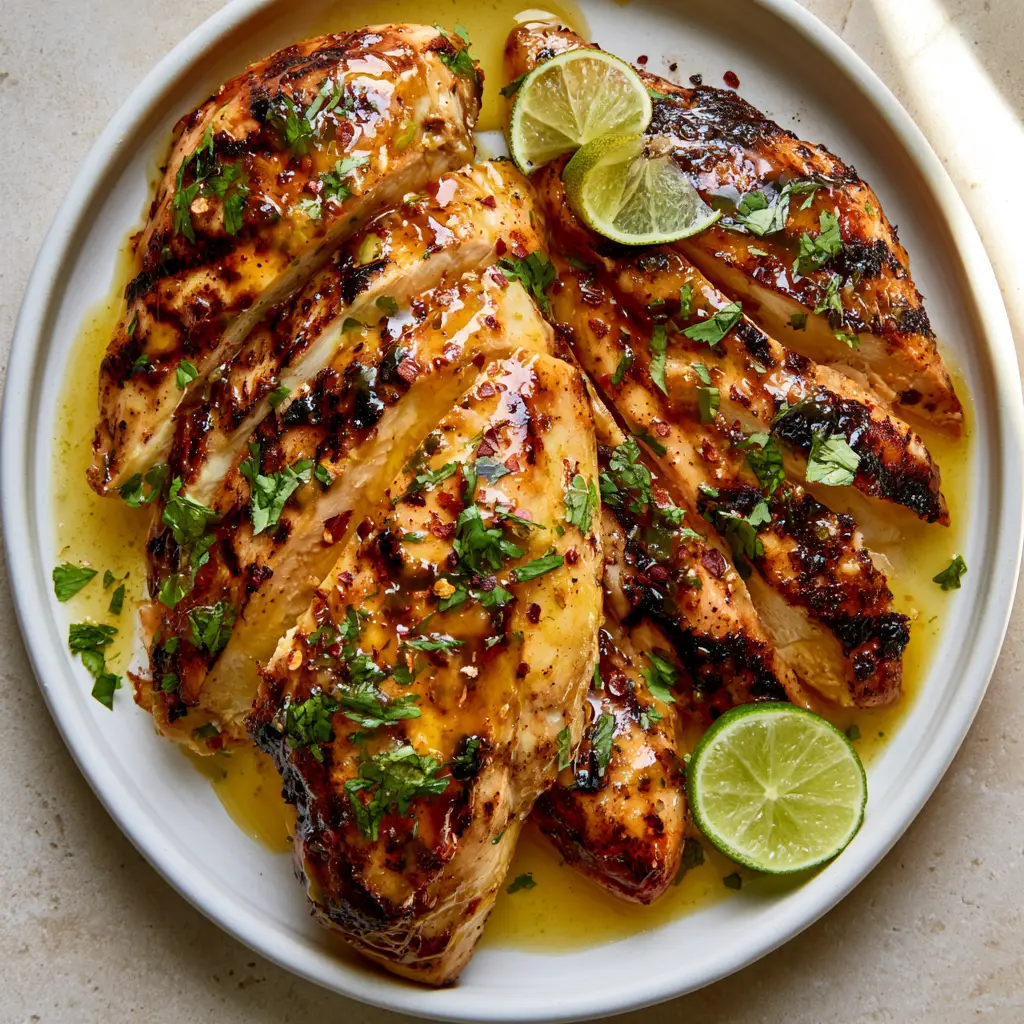
There is nothing quite as enticing as a platter of Honey Lime Chicken that looks just as good as it tastes. Imagine thick, succulent slices of chicken breast, each sporting deep, dark brown charred grill marks that speak to a perfect sear. The chicken isn’t just cooked; it is enveloped in a translucent, golden honey-lime glaze that catches the light with a “glowy” sheen, creating glistening sauce pools on a crisp white ceramic platter. This recipe is designed to help you achieve that exact professional food photography look in your own kitchen.
The secret to this dish lies in the balance between the floral sweetness of honey and the sharp, vibrant acidity of fresh lime juice. When these ingredients meet a hot pan or grill, they undergo a transformation, thickening into a luxurious syrup that clings to the meat. Topped with tiny flakes of bright green cilantro, paper-thin lime half-moons, and a light dusting of red chili flakes, this Honey Lime Chicken is a masterclass in flavor and visual appeal. Whether you are hosting a summer cookout or looking for a weeknight upgrade, this recipe delivers on every sensory promise.
Why This Sticky Honey Lime Chicken Recipe Works
- Perfect Visual Contrast: The deep brown sear marks against the translucent golden glaze provide a professional, high-end restaurant aesthetic.
- Dynamic Flavor Profile: You get the hit of sweetness from the honey, the tang of the lime, and a subtle back-end heat from the red pepper flakes.
- Structural Integrity: By using specific searing techniques, we ensure the glaze stays thick and “glowy” rather than running off the chicken.
- Glistening Texture: We utilize a specific reduction method to create those iconic glaze pools that look incredible on a white ceramic platter.
The Ultimate Flavor Pantry for Your Citrus Poultry
Chicken Breasts: Use 1.5 lbs (680g) of boneless, skinless chicken breasts. Ensure they are pounded to an even thickness to guarantee consistent grill marks and juicy centers.
Raw Honey: You will need 1/3 cup (80ml) of high-quality honey. This provides the viscosity and the sugars necessary for that signature “glowy” sheen and sticky finish.
Fresh Lime Juice and Zest: Use 3 tbsp (45ml) of juice and the zest of two limes. The acid cuts through the sugar, while the zest provides the essential oils for a powerful citrus aroma.
Neutral High-Heat Oil: 2 tbsp (30ml) of avocado or grapeseed oil is essential. These oils have high smoke points, allowing you to achieve those deep dark grill marks without the oil breaking down.
Fresh Cilantro: One small bunch, finely chopped. These tiny green flakes provide the necessary color contrast against the golden-brown chicken.
Red Chili Flakes: 1 tsp (2g) or to taste. This adds a light dusting of heat and visual interest, breaking up the translucency of the glaze.
Kosher Salt and Cracked Black Pepper: These foundational seasonings enhance the natural flavors of the poultry and the citrus marinade.
Essential Kitchen Gear for Professional Results
To achieve the visual results described in our blueprint, a standard frying pan won’t suffice. A heavy-duty cast iron grill pan or an outdoor grill is necessary to create those “deep dark brown seared grill marks.” The ridges of the pan allow the fat to render away while the direct contact points caramelize the honey and proteins.
You will also need a sharp chef’s knife for creating the “thin half-moon slices” of lime and finely mincing the cilantro. A small saucepan is required to reduce the glaze until it reaches a “glowy” consistency, ensuring it doesn’t just soak into the meat but sits beautifully on top. Finally, a white ceramic platter is the best choice for plating to make the golden sauce pools and green herbs truly pop.
The Step-by-Step Blueprint to a Sticky Citrus Finish
Preparing the Chicken for the Heat
Start by patting your 1.5 lbs (680g) of chicken breasts completely dry with paper towels. Moisture is the enemy of a good sear; if the surface is wet, the chicken will steam instead of developing those dark brown grill marks. Season both sides generously with kosher salt and cracked black pepper.
If you enjoy this flavor profile, you might also love our pan-seared honey-glazed salmon which uses a similar caramelization technique. For this chicken, let it sit at room temperature for 10 minutes to ensure an even cook throughout the breast.
Mastering the Deep Charred Grill Marks
Heat your grill pan over medium-high heat until it is wispy with smoke. Lightly coat the ridges with your high-heat oil. Place the chicken breasts down and do not move them for at least 5-6 minutes. This patience is what creates the deep, dark seared lines visible beneath the sauce.
Flip the chicken once. The internal temperature should reach 165°F (74°C). Once cooked, remove the chicken to a cutting board and let it rest for 5 minutes. Resting allows the juices to redistribute, ensuring that when you slice it, the meat stays succulent rather than drying out.
Reducing the Glowy Honey-Lime Glaze
While the chicken rests, combine the honey, lime juice, and lime zest in a small saucepan over medium heat. Bring the mixture to a simmer. You are looking for the bubbles to transition from thin and watery to slow and thick.
This reduction process is what creates the “translucent, golden honey-lime glaze.” It should be thick enough to coat the back of a spoon. If you like a bit more complexity in your poultry dishes, consider checking out our spicy Peruvian chicken (coming soon) for a different take on vibrant sauces.
Plating for Visual Impact
Slice the rested chicken breasts into 1/2-inch (1.25cm) thick pieces. Arrange them overlapping slightly on your white ceramic platter. Generously brush or pour the thickened glaze over the top, allowing it to settle into “small pools” between the slices.
Finish the dish by scattering the finely chopped cilantro and a light dusting of red chili flakes across the surface. Tuck the thin half-moon lime slices between the pieces of chicken. The natural daylight in your kitchen will catch the wet sauce, creating that beautiful, glowy sheen.
Expert Tips for Success
- The Honey Factor: If your glaze is too thin, simmer it for an extra 2 minutes. The sugars need to concentrate to achieve the “glowy” look.
- Avoid Burned Honey: Do not add the glaze to the chicken while it is still on the high-heat grill pan. The high sugar content in honey will burn and turn bitter before the chicken is done. Always glaze at the end.
- Lime Zesting: Only zest the green part of the lime. The white pith underneath is bitter and will ruin the delicate balance of the sauce.
- Uniform Slicing: Use a very sharp knife to slice the chicken. Clean cuts allow the glaze to sit on the surface rather than soaking into ragged edges.
Storage, Reheating, and Freezing
Storage: Keep leftover Honey Lime Chicken in an airtight container in the refrigerator for up to 3 days. The glaze will thicken further when cold, so it may look opaque until reheated.
Reheating: To maintain the “glowy sheen,” reheat the chicken gently in a skillet over low heat with a splash of water or extra lime juice. Avoid the microwave if possible, as it can toughen the chicken and break the emulsion of the glaze.
Freezing: You can freeze the cooked chicken, but the fresh cilantro and lime garnishes will not survive the thaw. Freeze the chicken and glaze for up to 2 months. Add fresh garnishes after reheating to restore the visual appeal.
What to Serve With This Citrus Masterpiece
Because this Honey Lime Chicken is so bold and bright, it pairs beautifully with neutral or slightly savory sides. A simple bed of jasmine rice is perfect for soaking up the glistening sauce pools. If you want a more vegetable-forward meal, try serving it alongside a chicken and zucchini stir fry for a themed dinner night.
For those who prefer a more European flair, consider serving the chicken with classic French side dishes like roasted potatoes or a light haricot vert salad. If you have leftover chicken, it makes a fantastic protein addition to ground beef bowl recipes or even sliced thin inside a crusty ciabatta sandwich.
Frequently Asked Questions
While possible, fresh lime juice is highly recommended. The natural oils in the fresh zest and the bright acidity of real limes are what give this dish its vibrant flavor.
The key is reducing the honey and lime juice in a separate saucepan until it thickens into a syrup. This concentrates the sugars and creates that professional ‘sheen’ rather than a watery sauce.
It has a very mild heat from the light dusting of red chili flakes. You can easily omit them for a kid-friendly version or double them if you prefer more kick.
Reheat in a skillet over low heat with a tablespoon of water or lime juice. This creates steam that thins the glaze and keeps the chicken moist.
Two reasons: the pan wasn’t hot enough, or the chicken was too wet. Ensure the pan is wispy with smoke and pat the chicken completely dry before seasoning.
The Ultimate Honey Lime Chicken Recipe
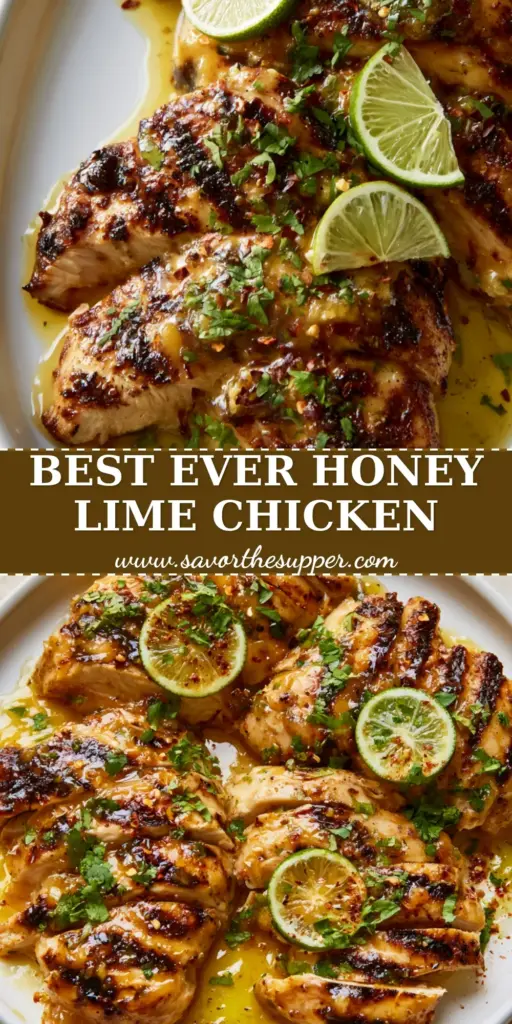
Honey Lime Chicken with a Sticky Citrus Glaze and Charred Grill Marks
Ingredients
Equipment
Method
- Pat the chicken breasts dry with paper towels. Season both sides generously with salt and pepper.
- Heat oil in a grill pan over medium-high heat. Sear chicken for 6 minutes per side until deep dark brown grill marks form and internal temp reaches 165°F (74°C).
- Remove chicken to a board and let rest for 5 minutes before slicing into 1/2-inch strips.
- Simmer honey, lime juice, and zest in a saucepan until thickened and translucent (about 3-5 minutes).
- Arrange sliced chicken on a white ceramic platter. Pour glaze over to create pools, then scatter cilantro, chili flakes, and lime half-moons.
Notes
Glaze the chicken only after it is off the heat to prevent burning the honey.
Bring the Glow to Your Table
This Honey Lime Chicken is more than just a meal; it’s a visual and culinary experience. The combination of charred, smoky chicken and a vibrant, translucent glaze creates a dish that is as satisfying to look at as it is to eat. We hope this recipe brings a splash of bright, citrusy joy to your kitchen tonight!
If you enjoyed this recipe, please leave a comment below and let us know how your glaze turned out! Don’t forget to sign up for our newsletter for more elite recipe blueprints and share your beautiful creations on Pinterest.