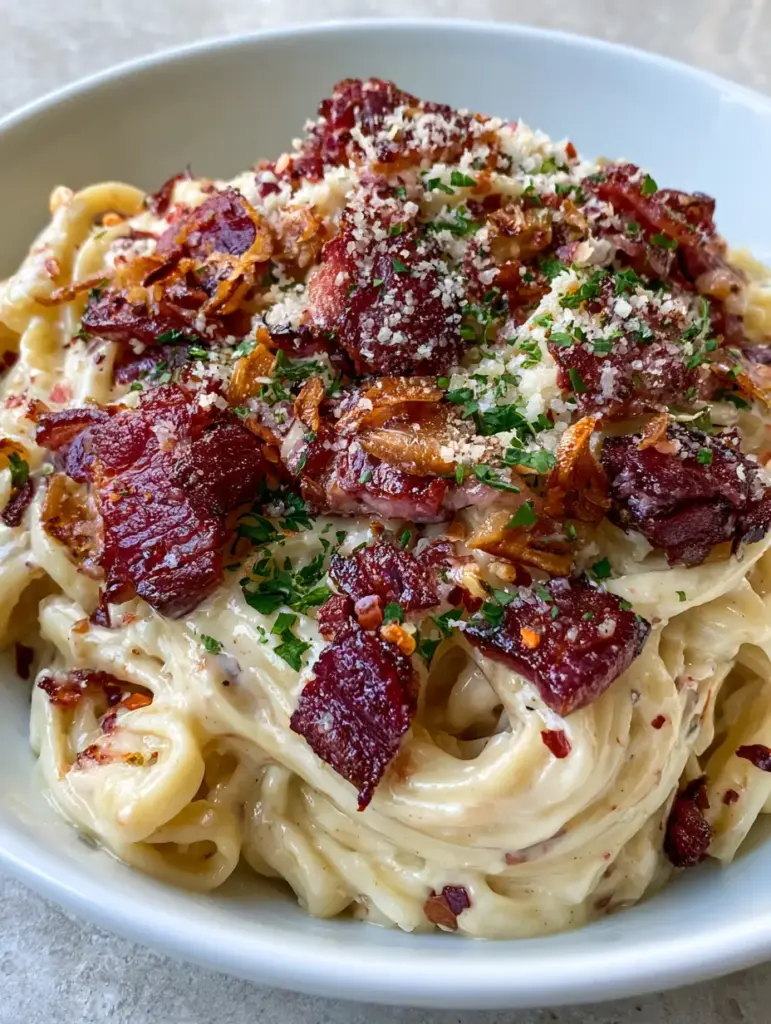
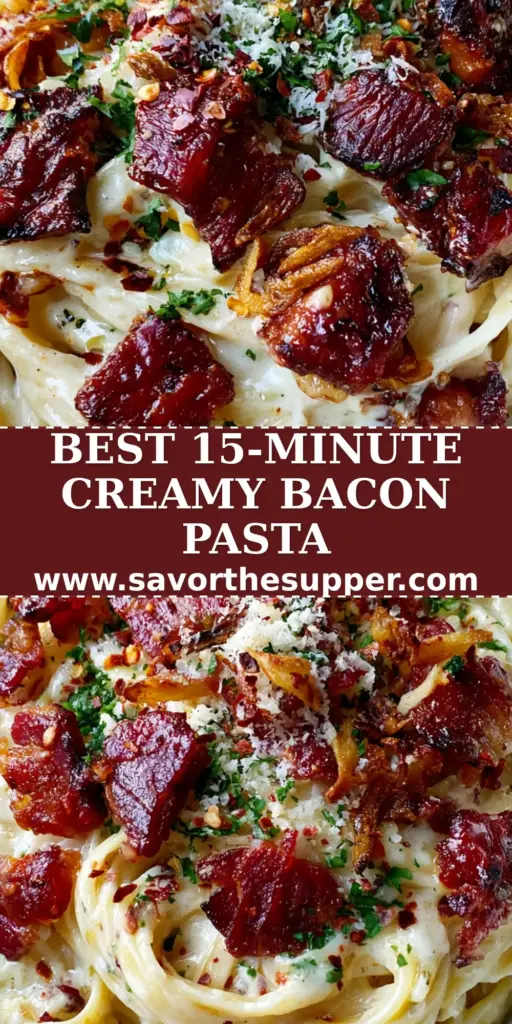
There is a specific kind of culinary magic that happens when thick-cut bacon meets a shimmering pool of garlic butter. This garlic bacon pasta isn’t just a meal; it is a sensory experience designed to be captured and devoured. Imagine a low-profile white ceramic bowl filled with perfectly swirled fettuccine, each strand glistening under a veil of ivory-colored cream sauce.
The visual appeal of this dish lies in its contrasts. The deep reddish-brown, jagged chunks of crispy bacon stand out against the pale, silky sauce, while thin slivers of toasted golden garlic provide a nutty crunch. A final dusting of fluffy parmesan and vibrant green parsley completes a look that is as professional as a high-end food photograph, yet achievable in just 15 minutes.
Whether you are looking for a quick weeknight win or a weekend indulgence, this recipe delivers restaurant-quality results. The combination of rendered bacon fat, melted butter, and heavy cream creates a foundational sauce that clings to the pasta without feeling heavy. It is the ultimate evolution of the 20-minute pasta category, proving that speed never has to sacrifice style or flavor.
Why This Creamy Garlic Bacon Fettuccine Works
- Textural Harmony: The recipe balances the “al dente” bite of premium fettuccine with the ultra-crispy charred edges of thick-cut bacon.
- Layered Garlic Profile: We use two methods—infused garlic butter for the sauce base and toasted golden garlic slivers for a crunchy, aromatic topping.
- Visually Stunning Presentation: Following the logic of high-quality food photography, the scattered red chili flakes and fresh parsley provide the essential color contrast against the neutral gray stone background of a modern kitchen.
- Speed and Efficiency: By utilizing the pasta boiling time to render the bacon and build the sauce, you reach the finish line in under 15 minutes.
The Anatomy of the Perfect Garlic Bacon Pasta Sauce
To achieve the “glistening ivory” look described in our visual blueprint, we must focus on the emulsification of high-fat dairy and starch-rich pasta water. Unlike a standard Alfredo, this garlic bacon pasta utilizes the rendered drippings from the bacon to add a smoky depth to the cream.
When the heavy cream hits the pan with the melted garlic butter, it undergoes a slight reduction, thickening naturally without the need for flour or thickeners. The addition of finely grated parmesan cheese acts as a binding agent, creating that signature silky texture that coat each noodle strand like a second skin. If you enjoy this flavor profile, you might also love our shrimp and mussels in creamy garlic sauce.
Essential Ingredients for Success
Thick-Cut Bacon: 8 oz (225g). You want jagged, substantial chunks that retain their chew even after being tossed in the cream sauce. Thin bacon will simply disappear into the moisture.
Fettuccine Noodles: 12 oz (340g). The wide surface area of fettuccine is the ideal canvas for a heavy cream sauce, ensuring every bite is fully coated.
Heavy Cream: 1 cup (240ml). Use full-fat heavy whipping cream to ensure the sauce doesn’t break or become watery when combined with the cheese.
Unsalted Butter: 2 tbsp (30g). This is the medium for toasting your garlic slivers, providing a rich, nutty base that oil simply cannot replicate.
Fresh Garlic: 4-6 large cloves. Half will be minced for the sauce, and the other half will be sliced into paper-thin slivers for the golden toasted topping.
Parmesan Cheese: 1/2 cup (45g), finely grated. Use a microplane to achieve a “fluffy” texture that melts instantly into the ivory sauce.
Fresh Flat-Leaf Parsley: 1/4 cup (15g), chopped. The vibrant green color is essential for breaking up the monochromatic tones of the pasta and cream.
Red Chili Flakes & Black Pepper: To taste. The chili flakes provide small pops of red color contrast, while the cracked black pepper cuts through the richness of the cream.
Professional Culinary Equipment Needed
To replicate the visual result of charred bacon edges and toasted garlic, a large cast-iron or heavy-bottomed stainless steel skillet is preferred. These materials retain heat better than non-stick pans, allowing for a superior sear on the bacon chunks.
You will also need a large pot for boiling the fettuccine, a microplane for the parmesan, and a sharp chef’s knife to create those precise garlic slivers. A pair of silicone-tipped tongs is essential for swirling the pasta into the bowl to achieve that professional “smartphone photo” aesthetic.
Step-by-Step Instructions to Culinary Perfection
1. The Pasta Foundation
Bring 4 quarts (3.8L) of heavily salted water to a rolling boil. Add the 12 oz (340g) of fettuccine and cook until just before al dente (usually 1-2 minutes less than the package directions). Reserve 1/2 cup (120ml) of the starchy pasta water before draining; this is your “liquid gold” for sauce consistency.
2. Rendering the Bacon Gold
While the pasta cooks, place the 8 oz (225g) of chopped bacon in a cold skillet. Turn the heat to medium and cook, stirring occasionally, until the fat has rendered and the chunks are deep reddish-brown with visible charred edges. Remove the bacon with a slotted spoon and set aside on a paper towel, leaving the rendered fat in the pan.
3. Toasting the Garlic Slivers
Add the 2 tbsp (30g) of butter to the bacon fat. Once foaming, add your thin garlic slivers. Watch them closely—you want them to turn a pale golden-brown. Once they reach a toasted hue, quickly remove them and set them aside with the bacon to maintain their crunch.
4. Building the Ivory Cream Sauce
In the same skillet, add the minced garlic and sauté for 30 seconds until fragrant but not browned. Pour in the 1 cup (240ml) of heavy cream. Bring to a gentle simmer, allowing it to reduce slightly for 2-3 minutes until it begins to look silky and thick.
5. The Final Emulsion
Lower the heat and whisk in the finely grated parmesan cheese until smooth. Toss in the cooked fettuccine and the reserved bacon chunks. If the sauce is too thick, add a splash of the reserved pasta water. The noodles should look glistening and swirled, not dry or clumped.
6. Garnish and Plating
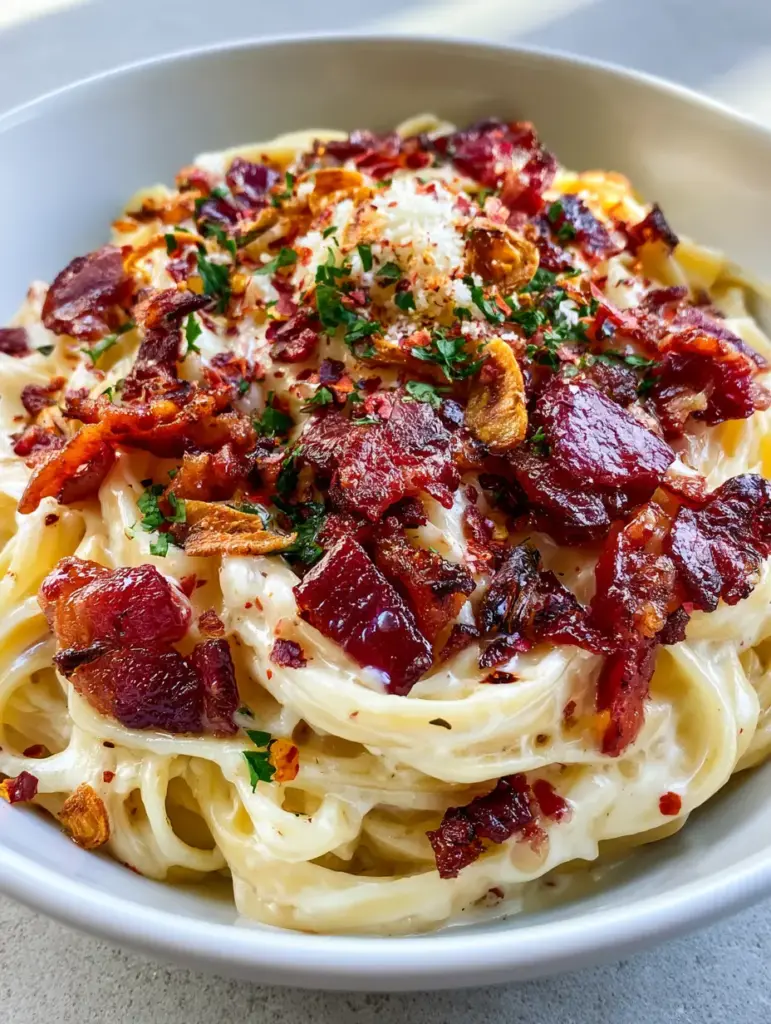
Transfer the pasta to a low-profile white ceramic bowl. Top with the toasted garlic slivers, freshly chopped parsley, a few pinches of red chili flakes, and a final dusting of fluffy parmesan. The cracked black pepper should be the final touch for visual texture.
Expert Tips for a Picture-Perfect Dish
- Cold Pan Start: Always start your bacon in a cold pan. This allows the fat to render slowly, resulting in a crunchier texture without burning the edges too quickly.
- Don’t Overcook the Garlic: Garlic slivers go from golden to bitter in seconds. Remove them from the heat the moment they look like light toasted almonds.
- The “Gloss” Factor: To get the glossy texture seen in high-quality food photography, ensure you add the pasta water at the very end. The starch creates a reflective sheen on the cream.
- Warm Your Bowls: A cold bowl will cause the cream sauce to seize. Run your ceramic bowls under hot water for a few seconds before plating to keep the garlic bacon pasta silky.
Storage and Reheating Advice
This dish is best served immediately to maintain the “silky” texture of the cream. However, if you have leftovers, store them in an airtight container in the refrigerator for up to 3 days. When reheating, the cream will likely have been absorbed by the noodles.
To revive the sauce, add a splash of milk or cream to the pan over low heat. Stir gently until the sauce becomes fluid again. Avoid the microwave if possible, as it can cause the butter fats to separate from the cream, leading to an oily finish.
What to Serve with Garlic Bacon Pasta
Because this pasta is rich and decadent, it pairs beautifully with light, acidic side dishes. A crisp green salad with a lemon vinaigrette or a side of traditional French vegetable sides can provide the perfect balance. If you want to keep the Italian theme going, a simple aglio e olio inspired vegetable medley works wonders.
For those looking for a complete feast, consider a protein-heavy side like bang bang chicken skewers to contrast the creamy textures of the fettuccine noodles.
Frequently Asked Questions
You can, but thin bacon tends to lose its texture once tossed in the heavy cream sauce. Thick-cut bacon is recommended for those jagged, crispy chunks that provide a necessary bite.
Ensure you use full-fat heavy cream and keep the heat on low when adding the parmesan cheese. If the sauce gets too hot, the fats can separate, resulting in an oily texture.
Cream-based pastas are best enjoyed fresh. However, you can store it for up to 3 days; just be sure to reheat it gently with an extra splash of cream to restore the silky texture.
Slice the garlic paper-thin and sauté them in the butter/bacon fat over medium-low heat. Remove them the moment they turn light tan, as they will continue to cook slightly from residual heat.
Pasta water contains starch released during cooking, which acts as a natural emulsifier. It helps bind the ivory cream sauce to the fettuccine strands and adds a professional-looking gloss.
The Ultimate 15-Minute Garlic Bacon Pasta Recipe
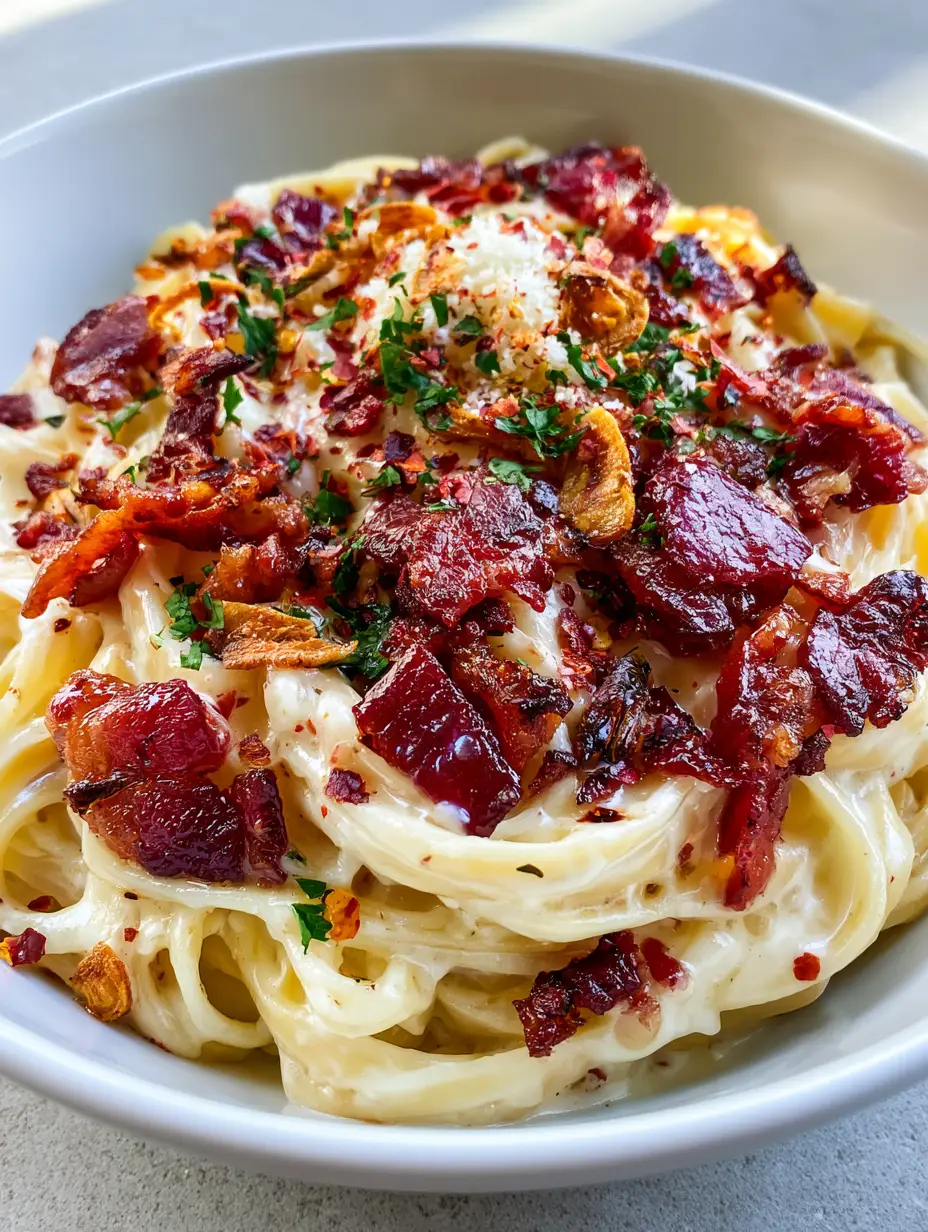
Garlic Bacon Pasta with Silky Cream Sauce and Crispy Bacon
Ingredients
Equipment
Method
- Cook fettuccine in salted boiling water until just before al dente. Reserve 1/2 cup (120ml) pasta water before draining.
- Start bacon in a cold skillet over medium heat. Cook until deep reddish-brown and crispy. Remove bacon, keeping the fat in the pan.
- Add butter to the pan. Sauté garlic slivers until golden brown. Remove and set aside with the bacon.
- Add minced garlic to the pan, then pour in heavy cream. Simmer for 2-3 minutes until slightly thickened.
- Whisk in parmesan cheese and a splash of pasta water. Toss in the cooked noodles and crispy bacon chunks until glistening.
Notes
Use a warm bowl for serving to keep the ivory cream sauce silky.
Closing & Call to Action
Mastering the garlic bacon pasta is a rite of passage for any home cook who values both speed and sophistication. The combination of crispy charred bacon, toasted garlic, and a luxurious cream sauce creates a restaurant-level meal in the comfort of your own kitchen. If you enjoyed this recipe, please leave a comment below and share your photos with us!
Don’t forget to follow us on Pinterest for more ultra-appetizing recipe inspiration and 20-minute meal ideas. Happy cooking!