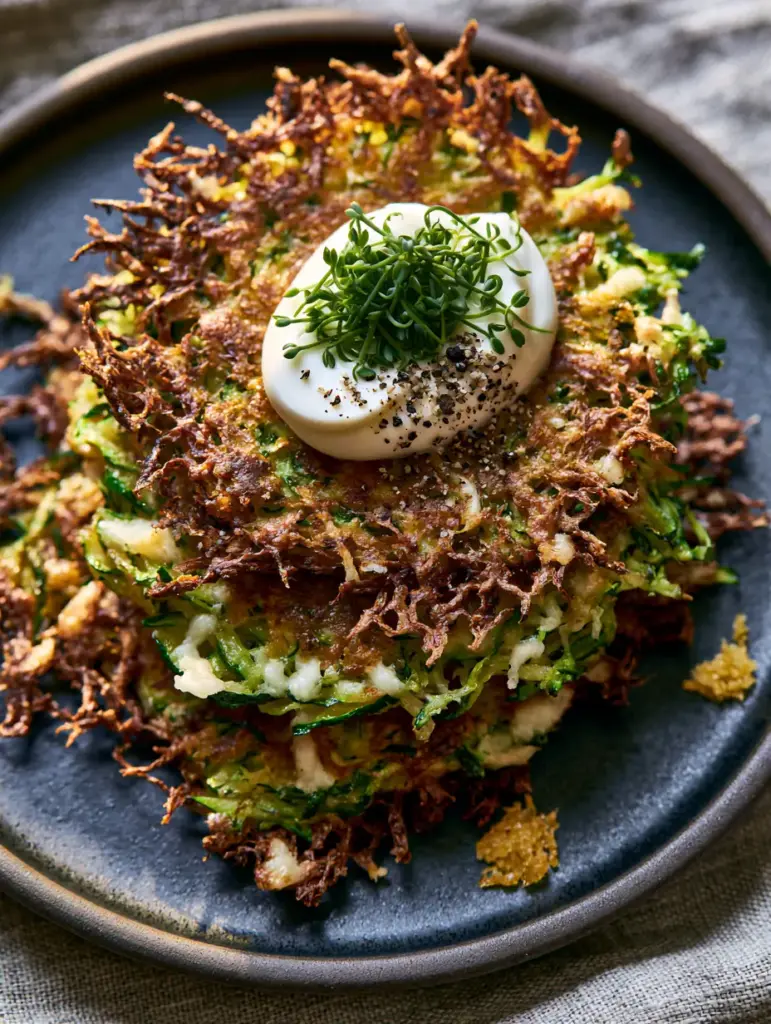
There is nothing quite like a perfectly executed Zucchini fritters recipe to celebrate the bounty of garden-fresh produce. Imagine a stack of three golden-brown fritters resting on a matte charcoal ceramic plate, their edges shattered into a delicate, lacy crunch that yields to a tender, savory center. This is not just a side dish; it is a masterclass in texture, balancing the vibrant snap of fresh green zucchini with the salty, melted richness of aged parmesan cheese.
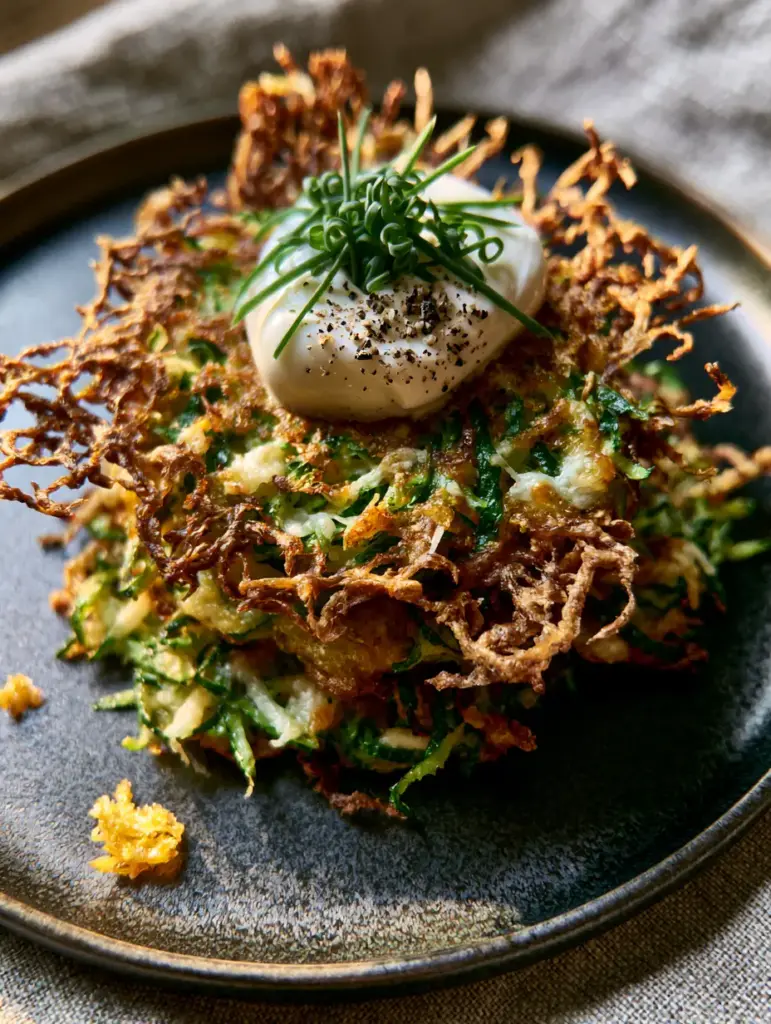
When you look at a professional plate of these fritters, you see the visual cues of success: jagged, ultra-crispy edges that catch the morning light and a thick, cold dollop of Greek yogurt that provides a stark, creamy contrast. Every bite offers the aromatic punch of minced garlic and the sharp, fresh finish of micro-chives. If you have struggled with soggy, limp vegetable patties in the past, this comprehensive guide will transform your culinary approach forever.
Why This Crispy Zucchini Fritters Recipe Works Every Single Time
Achieving the visual and textural standard of high-end smartphone food photography requires more than just mixing ingredients; it requires an understanding of moisture management and heat transfer. This recipe stands out because it focuses on the “forensic” details that make a dish truly gourmet.
- The Lacy Edge Architecture: We utilize a specific batter-to-vegetable ratio that ensures the edges fry into a jagged, golden-brown crown rather than a soft pancake rim.
- Structural Integrity: By identifying and removing excess moisture, we ensure the centers are perfectly set and never mushy, even when stacked three high.
- Flavor Complexity: The combination of coarse cracked black pepper and melted parmesan bits creates a flavor profile that is both rustic and sophisticated.
- Temperature Contrast: The heat of the pan-seared fritter against the chill of a thick Greek yogurt dollop creates a sensory experience that is unmatched.
Essential Elements for the Perfect Zucchini Fritters Recipe
To achieve the result seen in our visual blueprint, you must select your components with care. Each ingredient plays a vital role in the structural and flavor chemistry of the final dish.
Fresh Green Zucchini: You will need 1.5 lbs (680g) of firm, vibrant green zucchini. The skin provides the visual “green shreds” mentioned in our prompt, so do not peel them; simply grate them coarsely to maintain texture.
Kosher Salt: 1 tsp (6g) is required not just for seasoning, but for the “sweating” process. Salt draws out the internal moisture of the zucchini, which is the single most important step in preventing a soggy fritter.
All-Purpose Flour: 1/2 cup (65g) acts as the primary binder. This small amount of starch absorbs any remaining juices, helping to form those sought-after lacy edges during searing.
Large Egg: 1 egg (50g), lightly beaten, provides the protein structure needed to hold the shredded zucchini together as it hits the hot oil. It ensures the centers stay “set” and firm.
Parmesan Cheese: 1/2 cup (45g) of freshly shredded parmesan is non-negotiable. These bits melt and caramelize against the pan, creating the “melted white parmesan flecks” visible in the final photography.
Fresh Garlic: 2 cloves (approx. 6g), finely minced, provide a foundational aromatic warmth. Minced garlic integrates better into the batter than powder, ensuring every bite is fragrant.
Micro-Chives: 2 tbsp (5g) of fresh, finely chopped micro-chives add a bright, oniony finish. Their delicate size is perfect for the “precise sprinkle” seen on top of the yogurt dollop.
Greek Yogurt: 1/2 cup (120ml) of full-fat, cold Greek yogurt serves as the cooling crown. Its thickness is essential so it sits as a distinct dollop rather than running down the sides of the stack.
Black Pepper: 1/2 tsp (1g) of coarse cracked black pepper provides a visual and flavor pop. Use a coarse grind to replicate the artisanal look of the “handheld smartphone” aesthetic.
Neutral Searing Oil: 3 tbsp (45ml) of grapeseed or avocado oil is needed for the pan-searing process. These oils have high smoke points, allowing you to reach the temperatures necessary for golden-brown crispy edges.
The Culinary Physics of Moisture Removal
Before you even turn on the stove, you must master the art of the “squeeze.” Zucchini is approximately 95% water. If that water remains in your batter, it will turn to steam in the pan, resulting in a steamed, soft patty rather than a crispy fritter. This is the difference between a mediocre meal and a professional-grade Zucchini fritters recipe.
After grating your zucchini, toss it with the salt and let it sit for at least 10 minutes. You will see a pool of liquid forming. Use a clean linen napkin—like the light-grey one in our background—or a nut milk bag to wring out every possible drop. You should be left with a dry, compact ball of green shreds. This dryness is what allows the parmesan to “fleck” and the flour to create “lace.”
If you love the versatility of this vegetable, you might also enjoy exploring a variety of zucchini recipes that highlight different textures. For those who prefer a crunchier, oven-baked alternative, our baked parmesan zucchini fries offer a similar flavor profile with a different structural appeal.
Professional Tools for Gourmet Results
To replicate the high-end food photography look, your equipment matters. You don’t need a commercial kitchen, but a few specific tools will help you achieve the “top-down angled” perfection shown in our blueprint.
- Box Grater: Use the large-hole side for the zucchini to ensure visible “vibrant green shreds.”
- Cast Iron Skillet or Heavy Stainless Steel Pan: These retain heat better than thin pans, which is crucial for achieving the jagged golden-brown crust.
- Fish Turner or Thin Spatula: The lacy edges are delicate; a thin spatula allows you to flip the fritters without breaking the crispy perimeter.
- Matte Charcoal Ceramic Plate: Using a dark, matte surface makes the golden colors of the fritter pop and absorbs light, creating those deep shadows mentioned in the prompt.
Step-by-Step Instructions to Golden Perfection
Preparing the Zucchini Base
Begin by grating your zucchini into a large bowl. Sprinkle with the kosher salt and toss thoroughly. Let the mixture rest for 10-15 minutes. This rest period is non-negotiable for a successful Zucchini fritters recipe.
Transfer the zucchini to a lint-free kitchen towel. Twist and squeeze with all your might. You will be surprised by how much liquid is released. Repeat until no more water can be extracted. The zucchini should feel almost like sawdust in its dryness.
Mixing the Aromatic Batter
In a separate large bowl, whisk the egg, minced garlic, and coarse black pepper. Fold in the dry shredded zucchini, the shredded parmesan cheese, and the all-purpose flour. Use a fork to fluff the mixture, ensuring the parmesan bits are evenly distributed throughout the green shreds.
Do not overmix. Overworking the flour can lead to a rubbery texture. You want a loose, shaggy mass that just barely holds together when pressed. This “shaggy” quality is what creates the jagged, lacy edges during the frying process.
The Art of the Pan-Sear
Heat your oil in a large skillet over medium-high heat. You will know the oil is ready when it shimmers. Drop a tiny shred of zucchini into the pan; if it sizzles aggressively, you are ready to cook.
Scoop roughly 3 tbsp (45g) of the mixture into the pan for each fritter. Use the back of your spoon to gently press them down, but do not flatten them into perfect circles. Keep the edges irregular to encourage “lacy” development. Cook for 3-4 minutes per side. Look for the visual cue: a deep, mahogany-golden brown crust on the bottom before flipping.
Final Assembly and Plating
Once the fritters are crisp and the centers are set, transfer them briefly to a wire rack. This prevents the bottom from becoming soggy on a paper towel. Stack three fritters in a slight offset on your matte charcoal plate.
Top the stack with a generous, cold dollop of Greek yogurt. Sprinkle the fresh micro-chives precisely over the yogurt and finish with one final crack of coarse black pepper. Scatter a few golden crumbs on the plate to enhance the “handheld smartphone” food photography aesthetic.
Expert Tips for Zucchini Fritter Success
- Temperature Control: If the oil is too cold, the fritters will absorb grease. If it is too hot, the parmesan will burn before the zucchini centers set. Aim for a steady sizzle.
- Don’t Crowd the Pan: Fry only 3-4 fritters at a time. Overcrowding drops the oil temperature and prevents the lacy edges from forming properly.
- Parmesan Quality: Use a wedge of Parmesan Reggiano and grate it yourself. Pre-shredded cheeses are often coated in potato starch, which prevents the “melted flecks” look.
- The Yogurt Dollop: Use a warm spoon to scoop the cold yogurt. This creates a smooth, professional-looking surface on the dollop.
Serving Suggestions and Pairings
These fritters are incredibly versatile. While they shine as a standalone lunch, they also pair beautifully with other garden-inspired dishes. For a light summer meal, serve them alongside a crisp chilled cucumber salad.
If you are looking to round out a full dinner spread, these fritters act as a wonderful starter for a Mediterranean-themed menu. They pair exceptionally well with a side of fluffy coconut rice (coming soon) or even as a crunchy contrast to a savory stuffed pepper main course.
For those who have extra zucchini to spare, don’t forget that this vegetable can also lean sweet! Consider baking a loaf of decadent chocolate zucchini bread for dessert after your savory fritter feast.
Storage, Reheating, and Freezing
While these are best served immediately to preserve the lacy crunch, you can store leftovers in an airtight container in the refrigerator for up to 3 days. To reheat, avoid the microwave, which will make them rubbery.
Instead, reheat in a dry skillet over medium heat or in an air fryer at 375°F (190°C) for 3-4 minutes. This will revive the crispy parmesan edges. To freeze, place cooked and cooled fritters on a baking sheet to flash freeze, then transfer to a freezer bag. They will keep for up to 2 months.
Frequently Asked Questions
While you can bake them at 400°F (200°C), they will not achieve the same jagged, lacy golden-brown edges as the pan-seared version. For the best visual results, pan-searing is recommended.
Yes, you can substitute the all-purpose flour with a 1:1 gluten-free flour blend or chickpea flour. Chickpea flour actually enhances the crispiness of the lacy edges.
Use freshly shredded parmesan from a block rather than the finely powdered kind. The larger shreds melt against the pan to create those distinct, savory white flecks visible in the photography.
Use a neutral oil with a high smoke point, such as avocado, grapeseed, or canola oil. Avoid extra virgin olive oil for the initial sear as it can smoke and turn bitter at the necessary temperatures.
Sogginess is almost always caused by excess moisture in the zucchini. You must salt the shredded zucchini and squeeze it aggressively through a kitchen towel until it is bone-dry before mixing the batter.
The Ultimate Zucchini Fritters Recipe
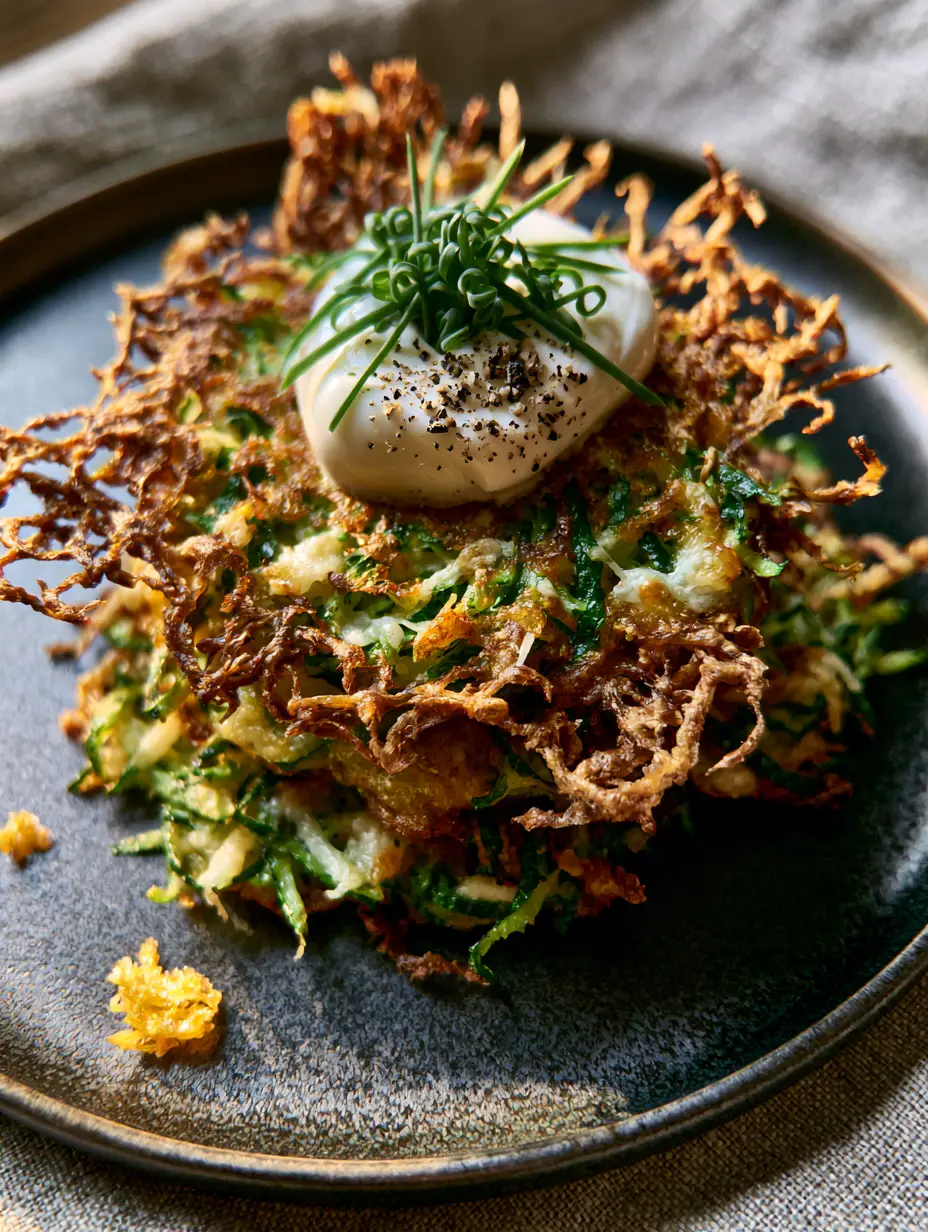
Zucchini Fritters Recipe: The Ultimate Guide to Crispy, Golden, and Lacy Perfection
Ingredients
Equipment
Method
- Grate the zucchini using a box grater and toss with salt. Let sit for 10 minutes to draw out water.
- Place zucchini in a linen napkin and wring out all liquid until the shreds are very dry.
- Combine dried zucchini with flour, egg, parmesan, garlic, and pepper. Do not overmix.
- Heat oil in a skillet. Drop 3 tbsp portions into the pan. Cook for 3-4 minutes per side until golden-brown and lacy.
- Stack fritters and top with a dollop of yogurt, chives, and extra pepper.
Notes
Use a high-smoke point oil like avocado oil for the best sear.
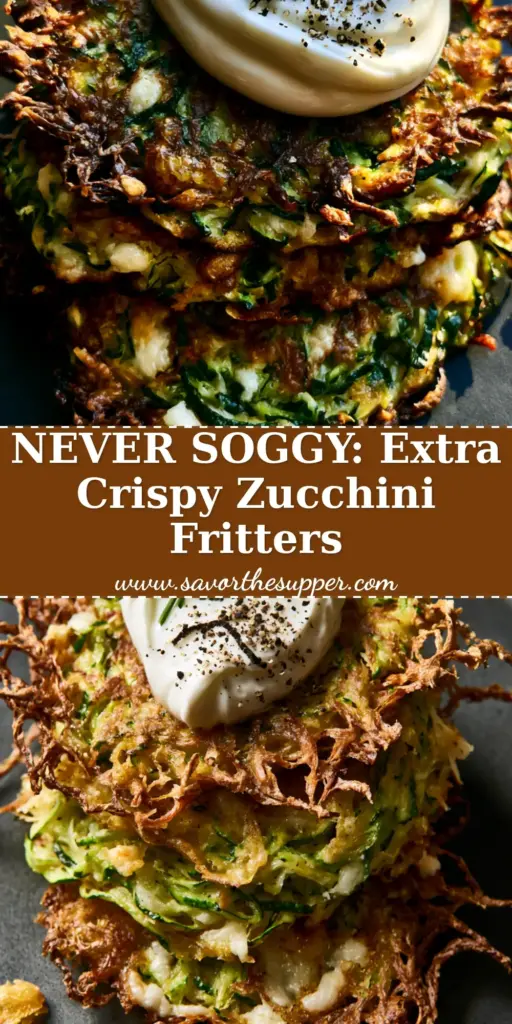
Elevate Your Home Cooking Today
The Zucchini fritters recipe is a testament to how simple ingredients, when treated with proper culinary technique, can result in a dish that looks as good as it tastes. By mastering the art of moisture removal and the science of the pan-sear, you have created a meal that is both visually stunning and deeply satisfying. We hope this guide inspires you to get into the kitchen and capture your own smartphone-worthy culinary moments.
Did you achieve those perfect lacy edges? We would love to hear about your results! Leave a comment below, and don’t forget to share your creations with us on Pinterest. For more kitchen inspiration, subscribe to our newsletter and never miss a savory update.