When two worlds of dessert royalty collide, the result is nothing short of spectacular. This banana pudding tiramisu takes the sophisticated, caffeine-fueled depth of a classic Italian tiramisu and marries it with the comforting, nostalgic soul of a Southern banana pudding.
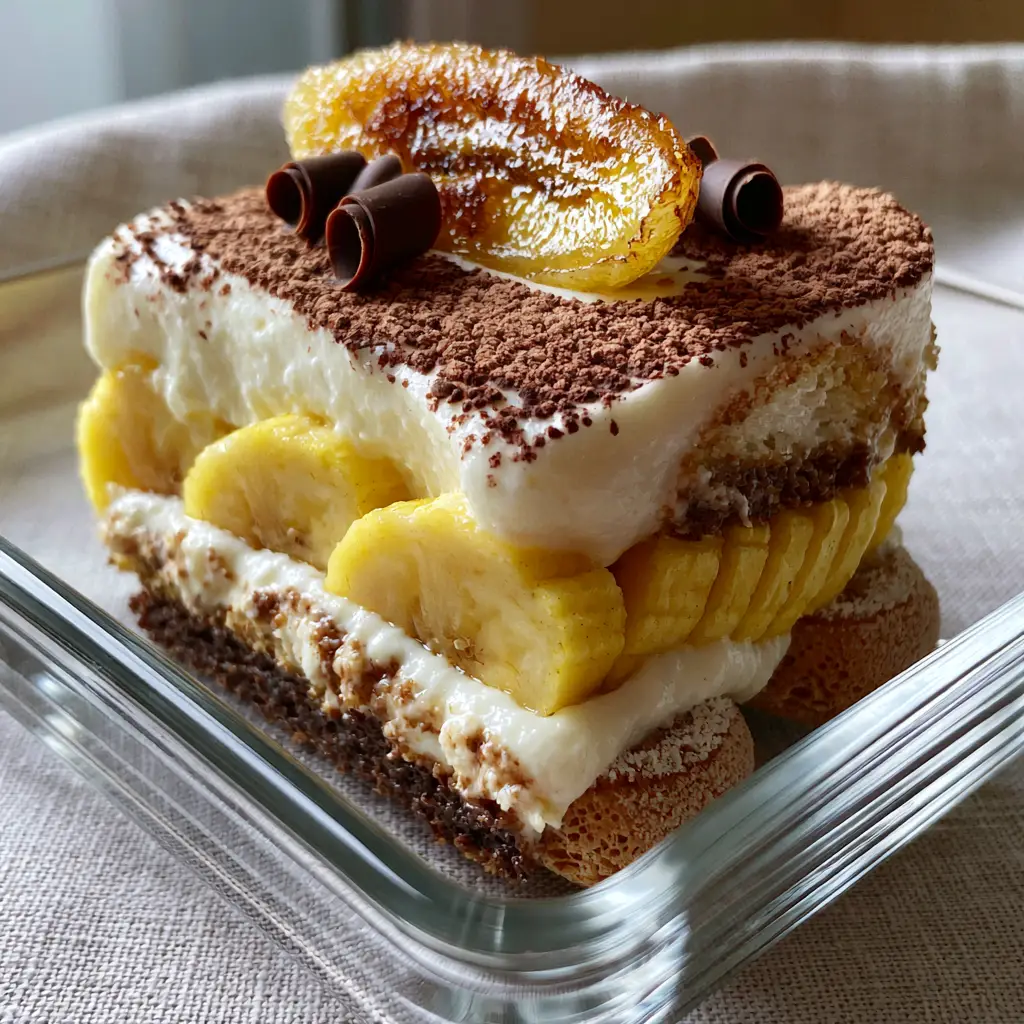
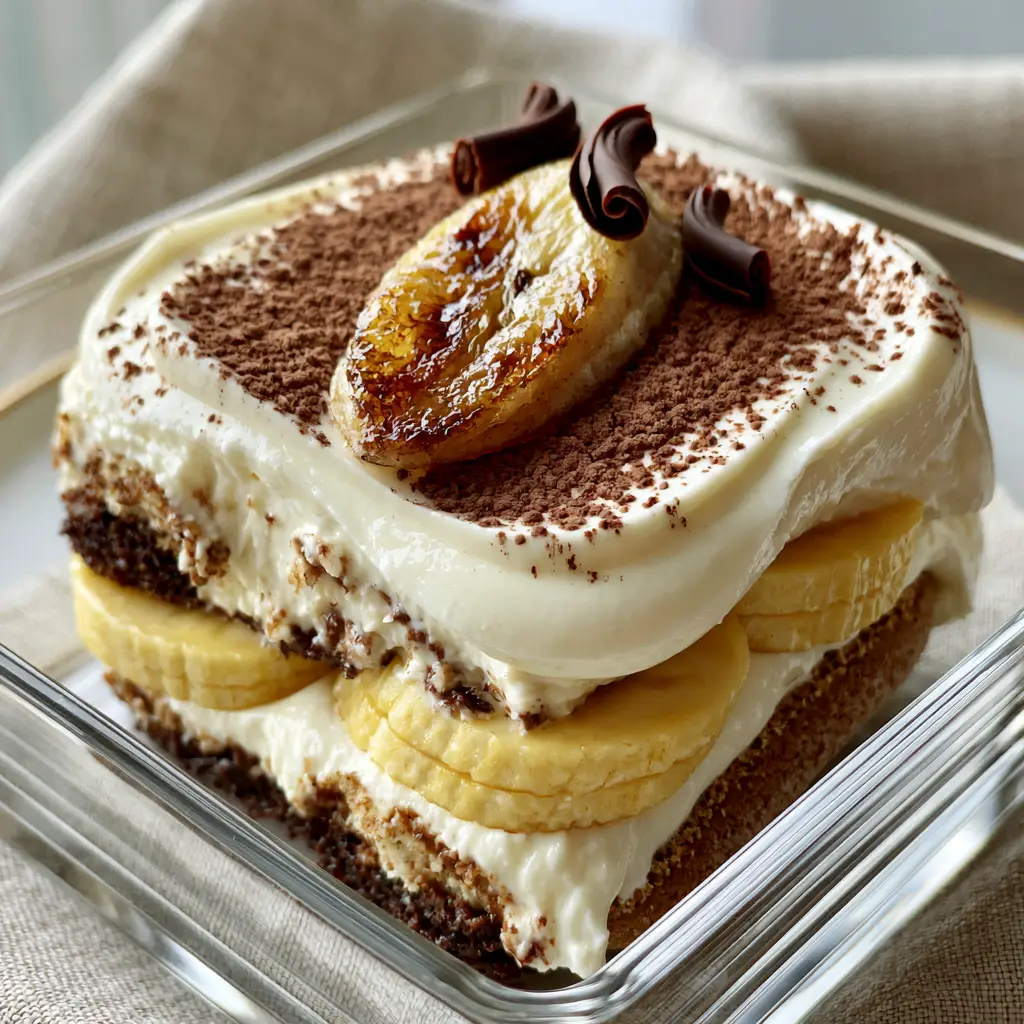
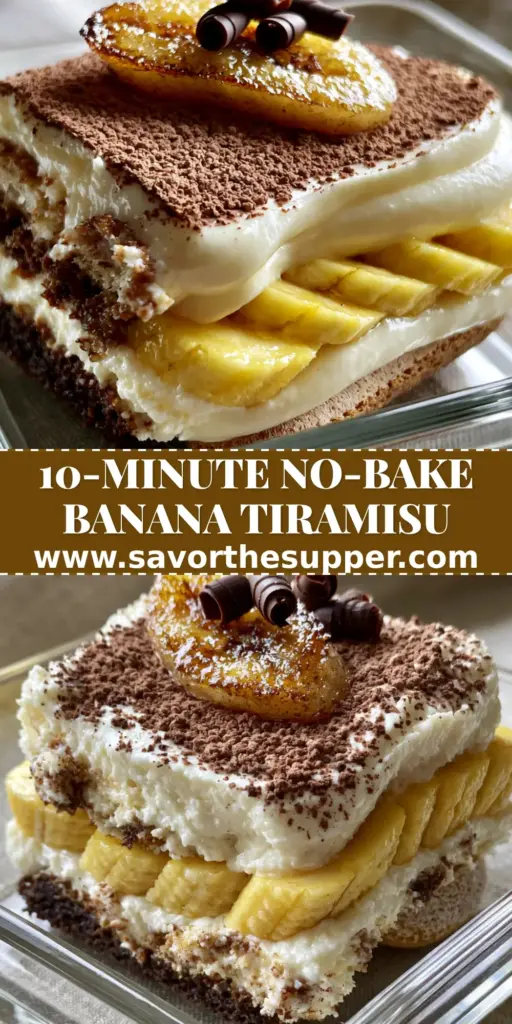
Imagine a pristine slice served in a transparent glass dish, revealing clearly defined layers of dark, espresso-soaked ladyfinger biscuits. Nestled between these are neatly sliced ripe yellow bananas and a thick, velvety blanket of egg-free mascarpone cream that tastes like a dream.
Topped with a light dusting of fine cocoa powder, a signature caramelized banana slice, and elegant dark chocolate curls, this dessert is a visual and culinary masterpiece. Whether you are hosting a dinner party or looking for a weekend project, this recipe delivers a professional-grade result right in your home kitchen.
Why You Will Crave This Modern Banana Pudding Tiramisu
- The Perfect Texture Balance: You get the crunch of the biscuit (transformed into a cake-like crumb), the softness of ripe fruit, and the silkiness of the mascarpone.
- Egg-Free Safety and Stability: By omitting raw egg yolks, we create a cream that is not only safer for everyone to enjoy but also holds its structural integrity longer in the fridge.
- Visual Sophistication: This isn’t just a “scoop and serve” pudding; it is a structured, layered architectural feat that looks stunning through glass.
- A Caffeine Kick: The espresso soak prevents the dessert from becoming overly sweet, providing a necessary bitter counterpoint to the sugary bananas.
Essential Ingredients for Your Layered Masterpiece
To achieve the specific visual results of our blueprint, the quality of your ingredients is paramount. Each element plays a specific role in the structure and flavor profile of the final banana pudding tiramisu.
Savoiardi (Ladyfingers): Use 7 oz (200g) of the hard, Italian-style biscuits. These are designed to soak up the espresso without disintegrating into mush, providing the “cake” layer of your dessert.
Strong Espresso: You will need 1.5 cups (350ml) of high-quality brewed espresso. This provides the dark, intense base that contrasts beautifully with the bright yellow bananas.
Mascarpone Cheese: 1 lb (450g) of cold mascarpone is the heart of the cream. Its high fat content ensures a velvety mouthfeel that mimics traditional pudding but with more structural “lift.”
Heavy Whipping Cream: 2 cups (480ml) of chilled cream are folded in to aerate the mascarpone. This creates the “egg-free” cloud texture that makes each bite feel remarkably light.
Ripe Yellow Bananas: Choose 3-4 large bananas that are perfectly yellow with minimal spotting. This ensures the slices inside the layers remain firm and visually distinct rather than turning brown or soft.
Powdered Sugar: 3/4 cup (90g) provides the sweetness. We use powdered sugar because it contains a hint of cornstarch, which helps stabilize the egg-free cream for those tall, sharp layers.
The Garnishes: You will need 2 tbsp (30g) of fine cocoa powder, a few dark chocolate curls, and an extra banana for that caramelized topping. If you love these flavors, you might also enjoy our chewy banana pudding cookies for a handheld treat.
Must-Have Tools for Professional Dessert Presentation
To replicate the “pristine slice” look from our visual prompt, you need the right gear. A transparent glass baking dish (9×9 inch or similar) is non-negotiable if you want to show off those beautiful layers.
An electric hand mixer or stand mixer is essential for achieving the “thick and velvety” consistency of the mascarpone cream. Without it, you’ll struggle to incorporate enough air into the heavy cream to support the weight of the bananas.
Lastly, a kitchen blowtorch or a very hot cast-iron skillet is needed for the caramelized banana garnish. This small detail adds a “burnt sugar” aroma that elevates the entire dish from home-cook to executive chef level.
How to Make Banana Pudding Tiramisu: Step-by-Step
1. Preparing the Espresso Foundation
Brew your espresso and pour it into a shallow bowl. It is vital to let the liquid cool to room temperature before dipping. If the espresso is too hot, the ladyfingers will absorb too much liquid too fast, ruining the structural integrity of your bottom layer.
While the coffee cools, you can prep your garnishes. Use a vegetable peeler on a block of dark chocolate to create those delicate dark chocolate curls mentioned in our blueprint. Set them aside in the fridge so they don’t melt from the heat of your hands.
2. Crafting the Egg-Free Mascarpone Cream
In a large chilled bowl, beat the mascarpone, powdered sugar, and a splash of vanilla extract until just smooth. In a separate bowl, whip the heavy cream until stiff peaks form. Look for a texture that looks like thick shaving cream; it should hold its shape entirely when the whisk is lifted.
Gently fold the whipped cream into the mascarpone. Do this by hand using a spatula, moving in a “J” motion. This preserves the air bubbles, ensuring the cream is “velvety” rather than dense and heavy.
3. The Strategic Layering Process
Take each ladyfinger and dip it into the espresso for exactly 2 seconds per side. Arrange them in a tight single layer at the bottom of your glass dish. They should look dark and saturated but still hold their rectangular shape.
Top the biscuits with a thin layer of mascarpone cream to act as “glue.” Now, arrange your neatly sliced yellow bananas in a dense, overlapping pattern. This fruit layer provides the signature flavor profile of the banana pudding tiramisu.
Spread the remaining mascarpone cream over the bananas, smoothing the top with an offset spatula for a pristine, flat surface. This creates the “thick, velvety” top layer seen in the handheld smartphone photo of our prompt.
4. The Visual Finish: Dusting and Caramelizing
Before serving, use a fine-mesh sieve to apply a light dusting of cocoa powder. The contrast between the dark cocoa and the white cream is a classic tiramisu hallmark. Sprinkle your dark chocolate curls over the center.
For the final touch, slice a banana on a bias. Dip the flat side in granulated sugar and sear it with a blowtorch until the sugar bubbles and turns deep amber. Place this caramelized slice on top of each serving. If you’re a fan of coffee-banana pairings, this dish goes perfectly with a hot homemade banana pudding latte (coming soon).
Pro Tips for High-Definition Dessert Layers
- The 2-Second Rule: Never soak ladyfingers for more than two seconds. They continue to soften as the dessert rests in the fridge.
- Temperature Control: Ensure your mascarpone and heavy cream are ice-cold. If they are even slightly warm, the cream will break and become grainy.
- Wipe the Glass: After spreading each layer, use a damp paper towel to wipe the inside edges of your glass dish. This ensures the “clearly defined layers” look professional and sharp.
- The Chill Factor: This dessert requires at least 6 hours in the fridge, though overnight is better. This allows the flavors to meld and the ladyfingers to reach a “cake-like” consistency.
Storage and Serving Suggestions
This banana pudding tiramisu is best enjoyed within 48 hours of assembly. Because fresh bananas can eventually oxidize (turn brown), the visual appeal is highest on day one. Always keep the dish tightly covered with plastic wrap to prevent the cream from absorbing fridge odors.
We do not recommend freezing this dish. The mascarpone cream can lose its emulsion upon thawing, resulting in a watery texture that ruins the velvety experience. For a lighter, fruit-forward alternative you can meal-prep, check out our creamy mango chia pudding (coming soon).
What to Serve with Your Tiramisu Fusion
Since this is a rich, creamy dessert, it pairs beautifully with savory, salty main courses. Consider starting your meal with a batch of spicy bang bang chicken or a light chicken and zucchini stir-fry.
The acidity in a dish like classic spaghetti aglio e olio also helps cleanse the palate before diving into the heavy mascarpone cream. If you’re hosting a full Italian night, the contrast between the garlic pasta and the sweet banana tiramisu is divine.
Frequently Asked Questions
Yes! You can caramelize the banana slices in a very hot non-stick skillet with a little butter and sugar for 1-2 minutes until golden brown.
While Nilla Wafers are traditional for banana pudding, they soften much faster than Savoiardi. For the distinct tiramisu layers, ladyfingers are highly recommended.
By sandwiching the slices tightly between layers of mascarpone cream, you limit their exposure to air, which keeps them yellow and fresh for up to 48 hours.
It takes about 6 hours for the espresso-soaked biscuits to reach a cake-like consistency. We recommend letting it sit overnight for the best texture.
Egg-free cream is more stable for layering, has a cleaner flavor that lets the banana shine, and is safer for pregnant women or those avoiding raw eggs.
The Official Banana Pudding Tiramisu Recipe Card
Banana Pudding Tiramisu: The Ultimate Creamy Fusion Dessert
Ingredients
Equipment
Method
- Brew 1.5 cups (350ml) of espresso and let it cool completely in a shallow bowl.
- In a chilled bowl, beat the heavy cream until stiff peaks form. In a separate bowl, whisk mascarpone and powdered sugar until smooth.
- Gently fold the whipped cream into the mascarpone mixture until a velvety, thick cream forms.
- Dip ladyfingers into espresso for 2 seconds per side and line the bottom of a glass dish.
- Spread a thin layer of cream over the biscuits, then top with a dense layer of sliced yellow bananas.
- Spread the remaining mascarpone cream on top, smoothing it flat with a spatula.
- Dust with cocoa powder and top with dark chocolate curls. Chill for 6 hours.
- Just before serving, sear a sugar-dipped banana slice with a torch and place on top.
Notes
Wipe the glass dish between layers for a clean, professional look.
Closing & Call to Action
This banana pudding tiramisu is more than just a dessert; it’s a conversation starter. By combining the bold intensity of Italian espresso with the soft, sweet comfort of Southern bananas, you’ve created a dish that satisfies every craving. The egg-free mascarpone ensures a stable, safe, and incredibly fluffy texture that will have your guests asking for seconds.
If you made this recipe, we’d love to see your “pristine slices!” Leave a comment below or share your photos with us. Don’t forget to follow and pin this recipe to your favorite boards on Pinterest so you never lose this recipe!