There is something inherently nostalgic about the combination of a buttery sugar cookie and the vibrant pop of rainbow sprinkles. These birthday cake cookies are designed to be an event in themselves, capturing the essence of a high-end bakery treat right in your own kitchen.
Inspired by the iconic, thick, and ultra-soft cookies that have taken social media by storm, this recipe delivers a dense, pale golden base that melts in your mouth. Unlike thin, crispy wafers, these are substantial, “Crumbl-style” masterpieces that feel like a celebration in every bite.
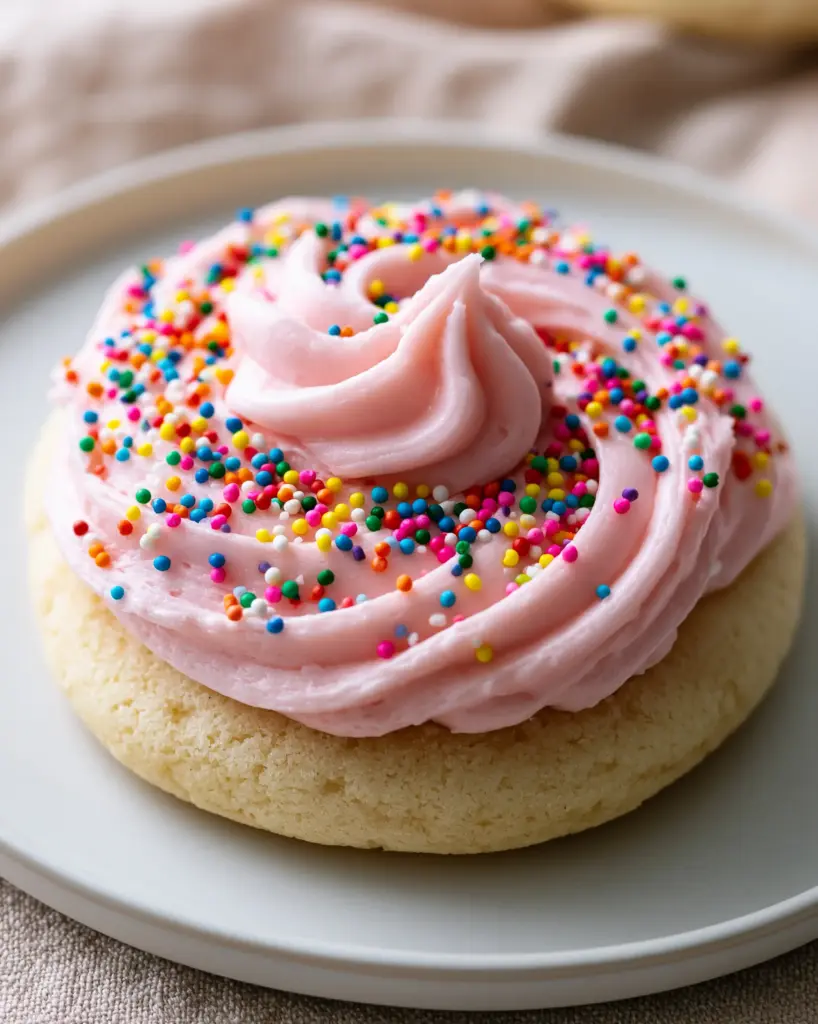
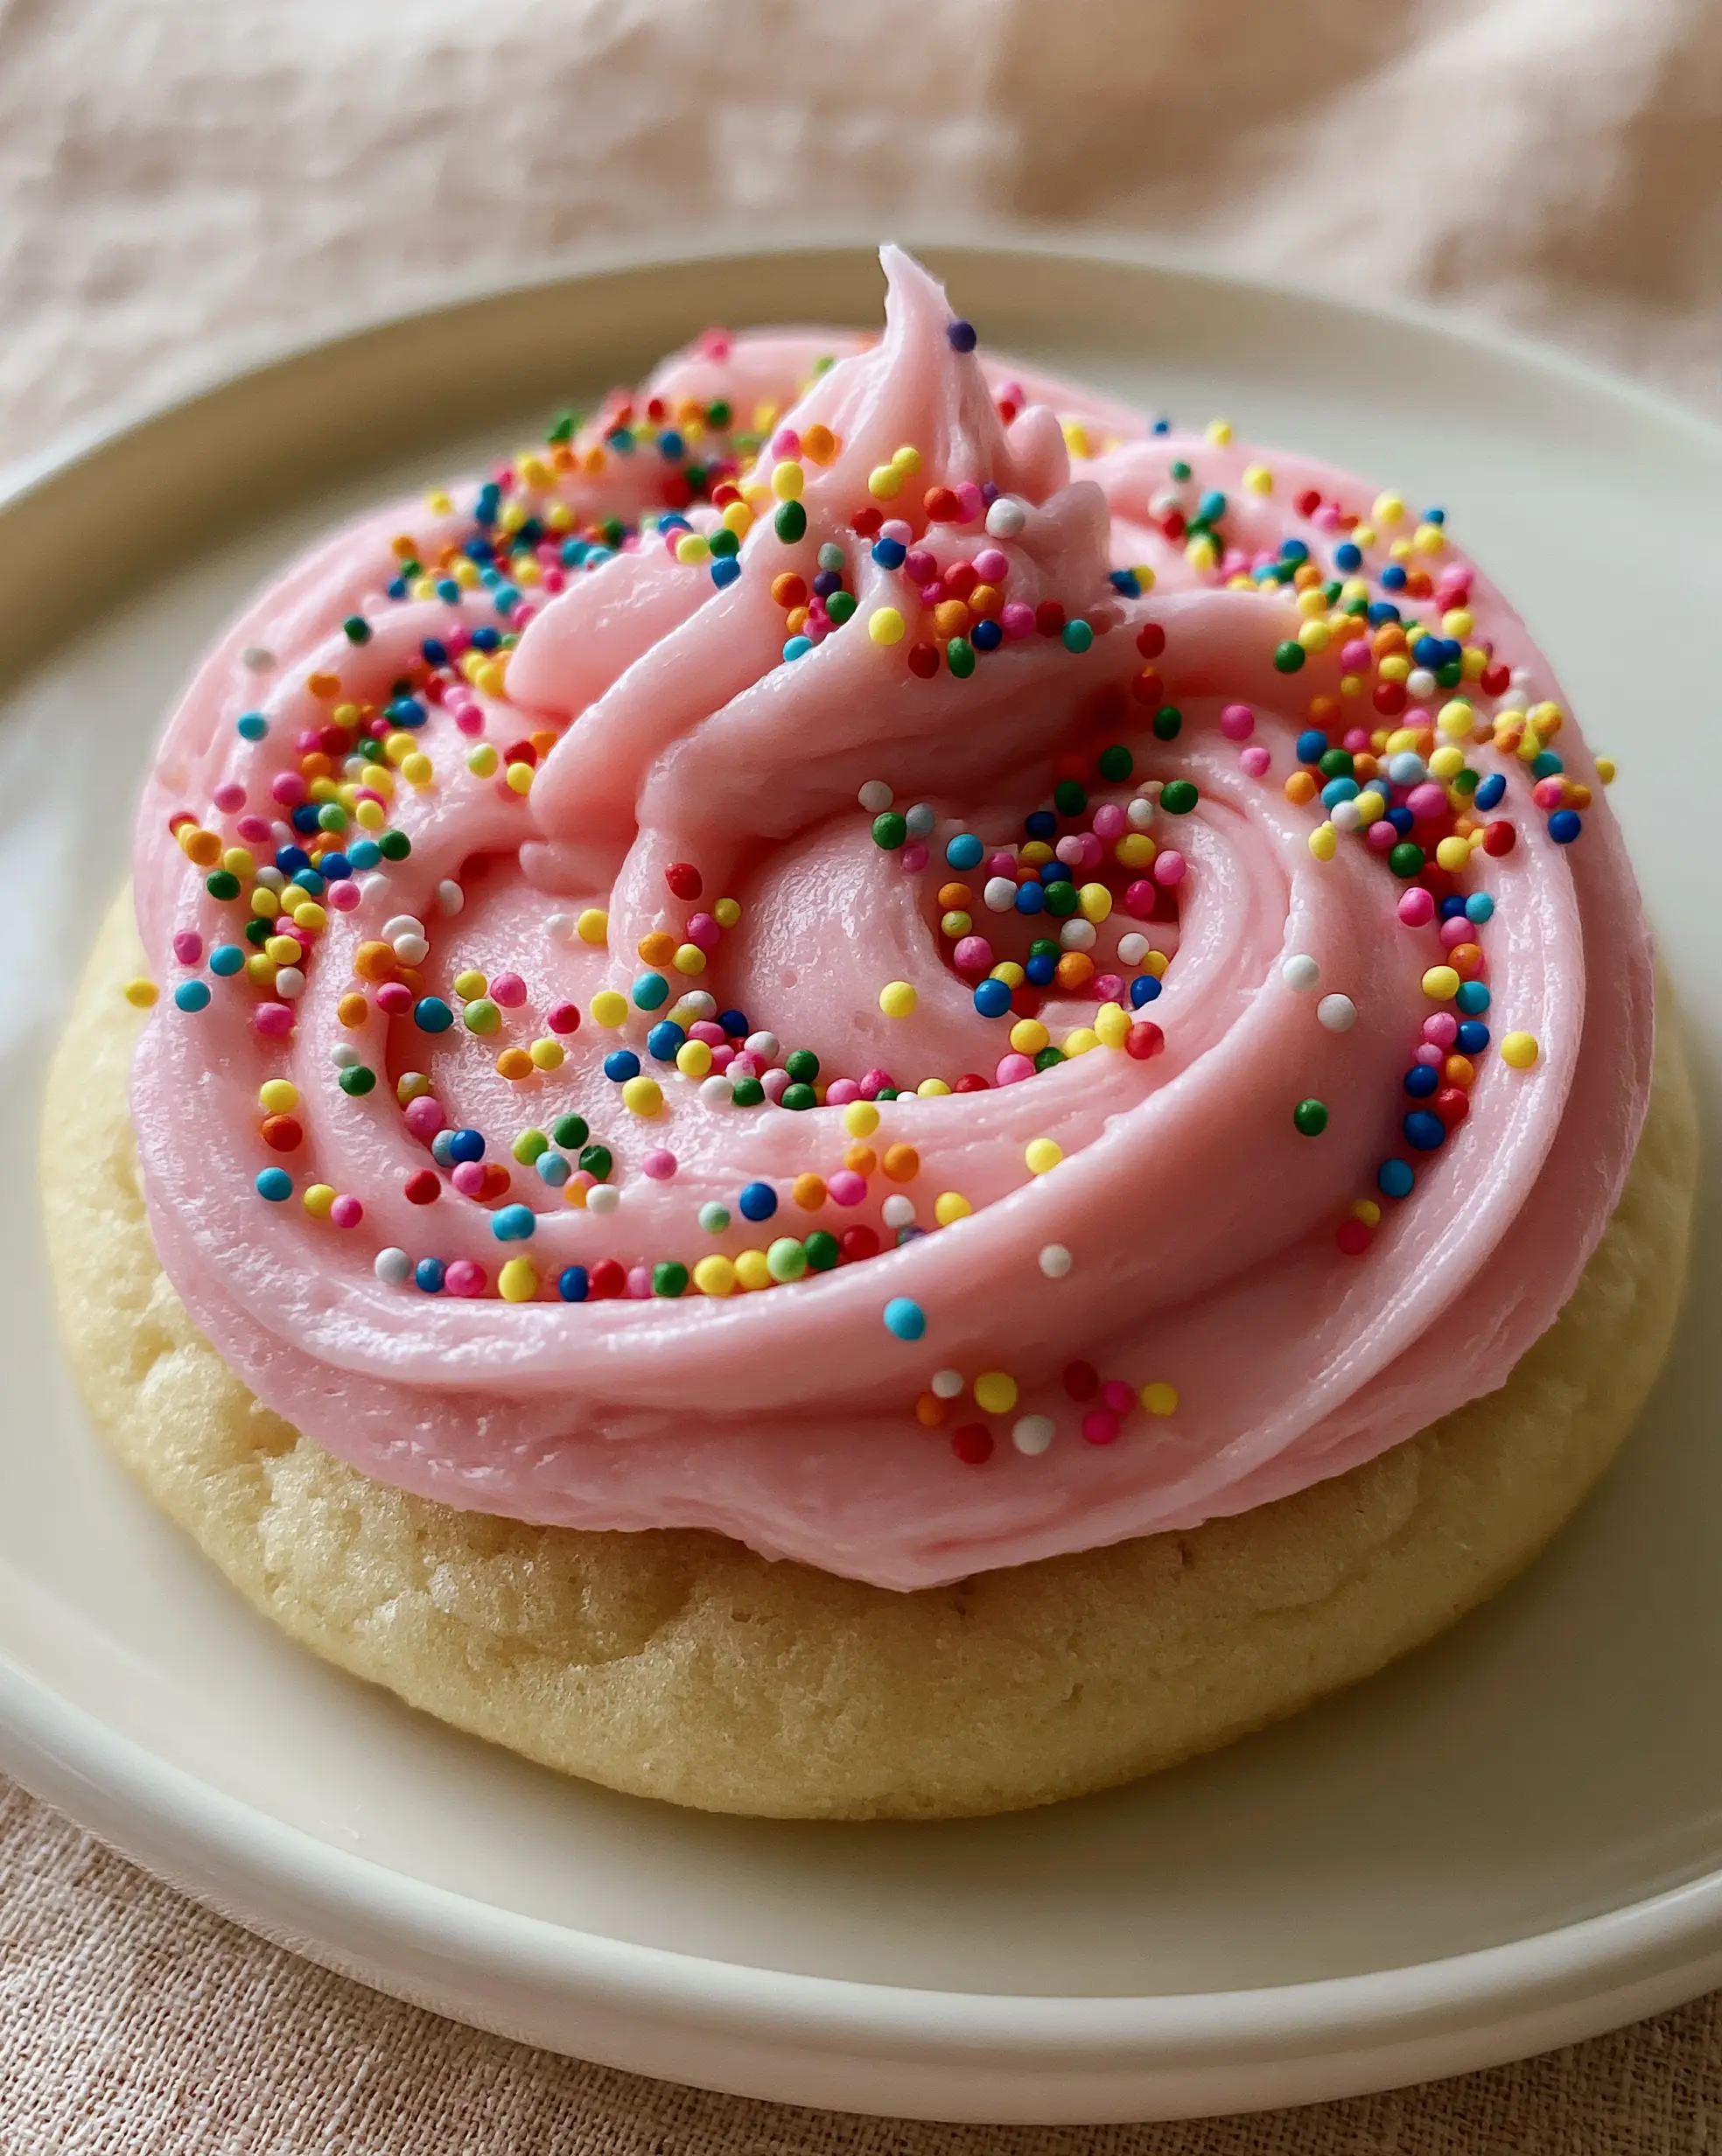
The star of the show is the luscious, pastel pink cream cheese frosting. It is whipped to a perfect consistency that allows for those signature clean swoops and deep ridges, providing a tangy contrast to the sweet, vanilla-scented cookie base. Whether you are making these for a party or a cozy weekend treat, they are guaranteed to disappear fast.
Why You Will Obsess Over These Bakery-Style Treats
- The Perfect Texture: A soft-baked, dense interior with a pale golden exterior that mimics the most sought-after professional sugar cookies.
- Visual Masterpiece: The thick, pastel pink frosting and vibrant rainbow nonpareil sprinkles create a stunning, photo-ready aesthetic.
- Tangy Balance: The addition of cream cheese in the frosting ensures these birthday cake cookies aren’t cloyingly sweet, but perfectly balanced.
- Make-Ahead Friendly: The dough holds up beautifully to chilling, making these an excellent option for advanced party prep.
The Anatomy of the Perfect Birthday Cake Cookie
To achieve the specific visual and structural results of a professional cookie, we must look beyond basic pantry staples. Every ingredient in these birthday cake cookies serves a scientific purpose to create that “soft-baked” magic.
Unsalted Butter (1 cup / 227g): Use high-quality, slightly cool room temperature butter. This provides the foundational fat that creates a tender crumb without allowing the cookies to spread too thin in the oven.
Granulated Sugar (1 ¼ cups / 250g): Sugar provides sweetness and helps in the slight aeration during the creaming process, contributing to that classic pale golden finish.
Large Egg (1 unit): The protein in the egg acts as the primary binder, providing the structure needed for a thick, 1-inch cookie that doesn’t crumble apart.
Vanilla & Almond Extracts (2 tsp / 10ml total): This combination is the “secret” to that nostalgic “cake” flavor. While vanilla provides warmth, a touch of almond extract mimics the flavor profile of traditional wedding cakes.
All-Purpose Flour (3 cups / 375g): This is our structural backbone. We use a precise measurement to ensure the cookie remains dense and soft rather than cakey or dry.
Cornstarch (2 tsp / 5g): An essential “invisible” ingredient. Cornstarch softens the proteins in the flour, resulting in a more delicate, “melt-in-your-mouth” texture.
Baking Powder (1 tsp / 5g): Unlike baking soda, which aids in browning, baking powder provides a clean lift, keeping the cookies pale and thick.
Full-Fat Cream Cheese (8 oz / 225g): For the frosting, always use the block variety. It provides the structural integrity needed for those thick, luscious swoops seen in professional food photography.
Rainbow Nonpareil Sprinkles (3 tbsp / 45g): These tiny, vibrant beads add a crunch and a festive visual pop that larger jimmies simply can’t match.
If you enjoy experimenting with different dessert profiles, you might also want to check out our guide on creative cake pop flavors (coming soon) for your next celebration. Much like these cookies, cake pops rely on the perfect ratio of crumb to frosting.
Essential Tools for Success
To achieve the “Crumbl-style” thickness, you will need a few specific kitchen tools. A large cookie scoop (about 3 tablespoons in volume) is non-negotiable for ensuring even baking and consistent size.
For the frosting, a stand mixer or a powerful hand mixer is required to whip the cream cheese and butter into a cloud-like consistency. To get those beautiful, professional “swoops,” a small offset spatula is your best friend.
Finally, high-quality parchment paper or a silicone baking mat will prevent the bottoms of these birthday cake cookies from browning too quickly, preserving that pale golden visual aesthetic.
Step-By-Step: Crafting the Ultimate Birthday Cake Cookies
1. Creaming for Structure
In the bowl of your mixer, combine the cool room temperature butter and granulated sugar. Beat on medium-high speed for approximately 3-4 minutes until the mixture is pale and fluffy.
You aren’t just mixing; you are aerating. These tiny air bubbles will expand in the oven, giving your thick cookies a light, soft bite rather than a leaden feel.
2. Integrating the Aromatics
Add the egg and the vanilla and almond extracts. Mix on low speed until just combined. Be careful not to over-beat at this stage, as too much air can cause the cookies to puff and then deflate.
3. The Dry Ingredient Fold
Whisk together the flour, cornstarch, baking powder, and a pinch of salt. Gradually add the dry mixture to the wet ingredients. Mix until just combined—when you see no more streaks of white flour, stop the mixer immediately.
4. Shaping and Chilling
Scoop large mounds of dough (approx. 60g each) and roll them into smooth balls. Place them on a tray and chill in the refrigerator for at least 30 minutes. This prevents the fat from melting too fast, ensuring your birthday cake cookies stay thick and tall.
5. The Pale Gold Bake
Preheat your oven to 350°F (175°C). Place the chilled dough balls on a lined baking sheet, spacing them 3 inches apart. Bake for 10-12 minutes.
Visual Cue: The edges should be set but the centers should still look slightly underdone and matte. They should remain pale golden, with no significant browning on the tops. Allow them to cool completely on the pan to finish setting.
6. Whipping the Pastel Pink Frosting
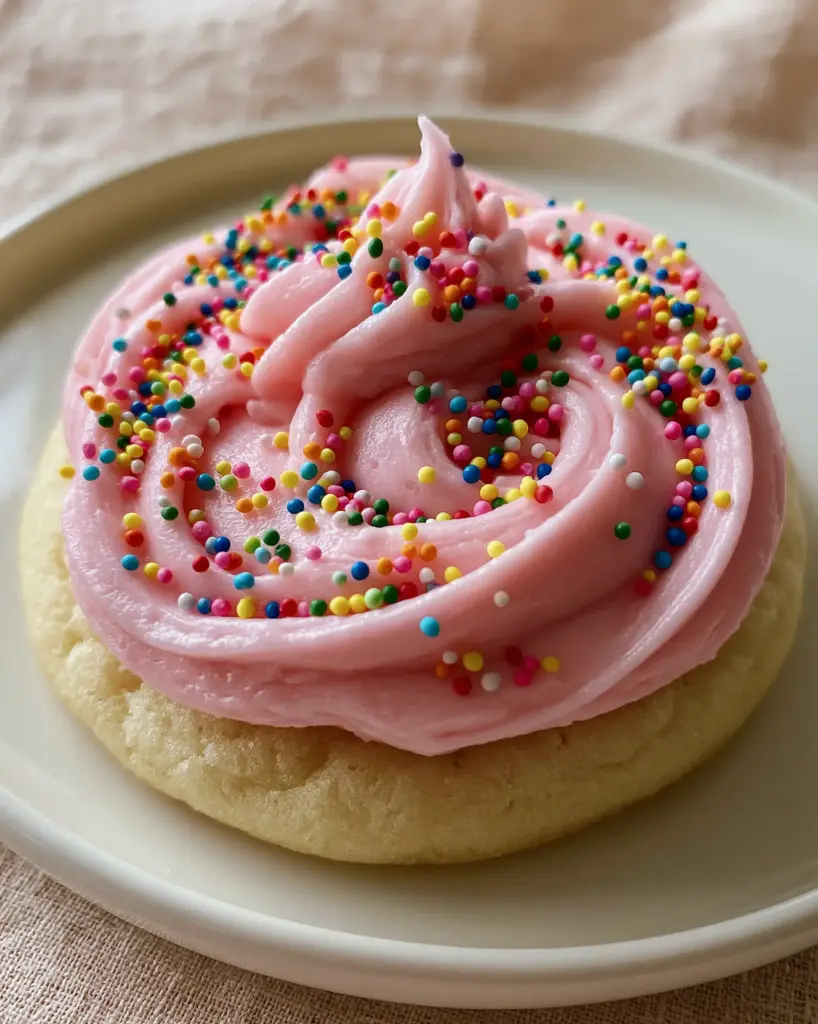
Beat the cold cream cheese and softened butter together until smooth. Gradually add powdered sugar (4 cups / 500g) and a splash of heavy cream. Add a tiny drop of pink gel food coloring—gel is superior to liquid as it doesn’t thin out the frosting.
Whip until the frosting is stiff enough to hold a peak. Use your offset spatula to create thick, generous swoops across the top of each cooled cookie. Finish with a heavy-handed scatter of rainbow nonpareils.
Expert Tips for Bakery-Quality Results
- Don’t Overbake: This is the golden rule. If the cookies look “done” in the oven, they will be overdone once cooled. Remove them while the centers are still soft.
- Use Room Temp Ingredients: For the frosting, ensure your butter is soft but your cream cheese is slightly cool. This creates the best “swoopable” texture.
- Weight Your Flour: If you don’t have a scale, fluff your flour with a spoon before scooping it into a measuring cup. Packed flour results in dry, crumbly cookies.
- The Swoop Technique: Place a dollop of frosting in the center, then use the tip of your spatula to spiral outward, pressing down slightly to create those deep ridges.
Pairing Your Birthday Cake Cookies
These cookies are quite rich, making them the perfect partner for a glass of cold milk or a sharp espresso. If you’re hosting a full dinner party, they serve as a wonderful light-hearted dessert after a savory meal like our creamy garlic sauce seafood pasta.
For a more casual gathering, consider serving these alongside other finger foods. If you’re looking for more quick dessert inspiration, our microwave mug snacks are a great way to satisfy a sweet tooth in under five minutes.
If you love the flavor profile of these cookies, you might also enjoy the creamy, nostalgic notes found in our banana pudding cookies, which offer a similar soft-baked texture with a fruity twist.
Storage and Freshness
Because of the cream cheese frosting, these birthday cake cookies should be stored in an airtight container in the refrigerator. They will stay fresh and soft for up to 5 days.
If you need to stack them, place a layer of parchment paper between the cookies to protect the beautiful frosting swoops. For the best flavor, let them sit at room temperature for 15 minutes before serving to soften the frosting slightly.
You can also freeze the un-frosted cookie bases for up to 3 months. Simply thaw and frost them when you’re ready for a celebration!
Common Questions About Birthday Cake Cookies
While you can, canned frosting is much thinner. To get the ‘clean swoops’ shown in the photos, a homemade cream cheese frosting is necessary for its structural integrity.
It’s optional, but it’s the key ingredient for that specific ‘birthday cake’ or ‘cake batter’ flavor that differentiates these from standard sugar cookies.
Use a small offset spatula and apply a generous amount of frosting. Press down slightly and rotate the cookie to create the ridges and swoops.
This usually happens if the butter was too warm or you skipped the chilling step. Make sure your dough is cold before it hits the oven to maintain that signature height.
That is exactly what you want! Soft-baked cookies finish setting on the warm baking sheet. If they look browned and fully cooked in the oven, they will be crunchy once cooled.
The Ultimate Birthday Cake Cookie Recipe
Birthday Cake Cookies with Thick Pink Cream Cheese Frosting
Ingredients
Equipment
Method
- Cream butter and sugar on medium-high for 4 minutes until pale and fluffy.
- Mix in the egg and extracts on low speed until combined.
- Gradually add flour, cornstarch, and baking powder. Mix until no streaks remain.
- Scoop 60g balls, chill for 30 mins, then bake at 350°F (175°C) for 10-12 mins until edges are set but pale.
- Whip cream cheese, butter, and powdered sugar with pink food gel. Swoop onto cooled cookies and top with sprinkles.
Notes
Use gel food coloring for the most vibrant pink without affecting the frosting consistency.
Closing & Call to Action
These birthday cake cookies are more than just a dessert; they are a celebration of texture and classic flavors. With their thick, soft-baked base and luscious pink frosting, they are sure to be the highlight of any dessert table.
Did you try this recipe? We would love to see your beautiful frosting swoops! Tag us in your photos and be sure to follow us on Pinterest for more bakery-style inspiration. Don’t forget to sign up for our newsletter to get elite recipes delivered straight to your inbox!