Indian rice paper rolls are the ultimate fusion snack, combining the light, gluten-free crunch of Vietnamese-style wraps with the bold, aromatic punch of North Indian street food. If you are looking for a vibrant, vegetable-packed meal that feels both indulgent and incredibly fresh, this recipe is your new weeknight staple.
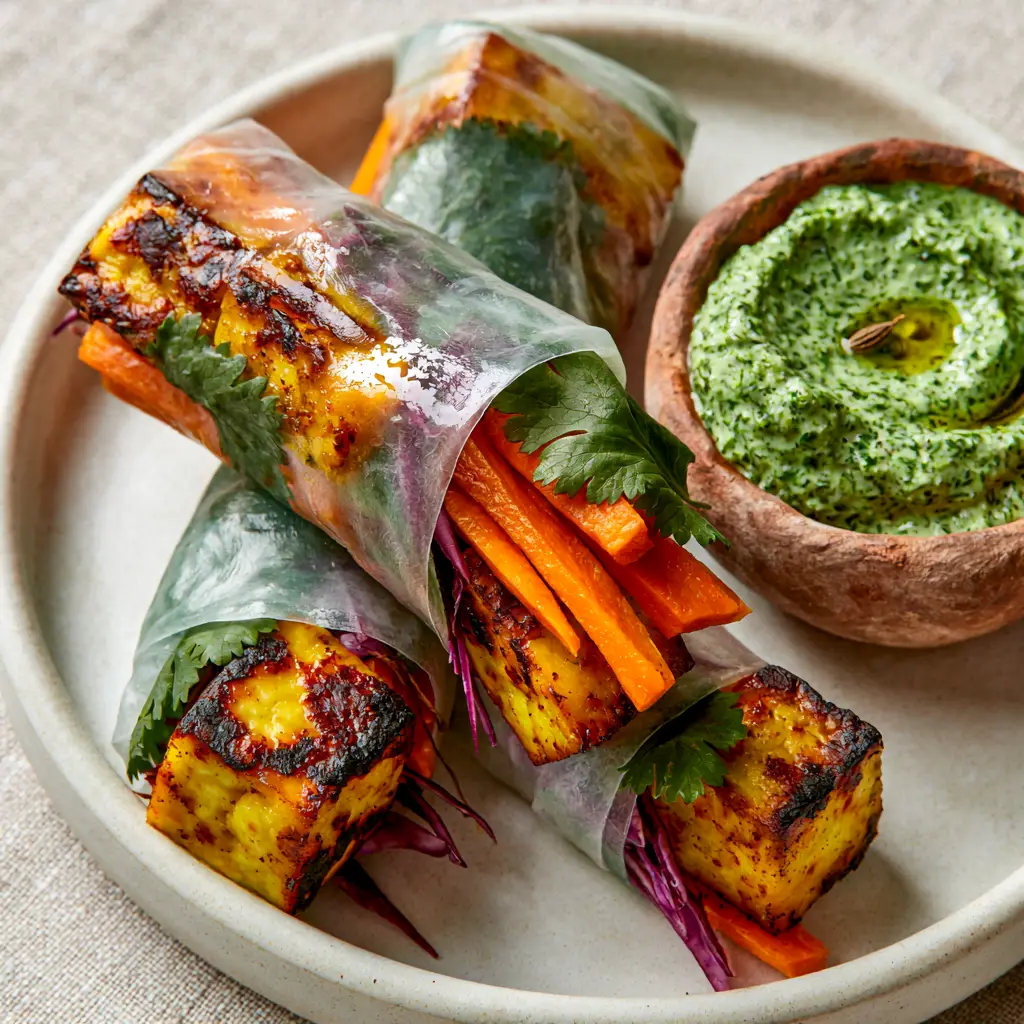
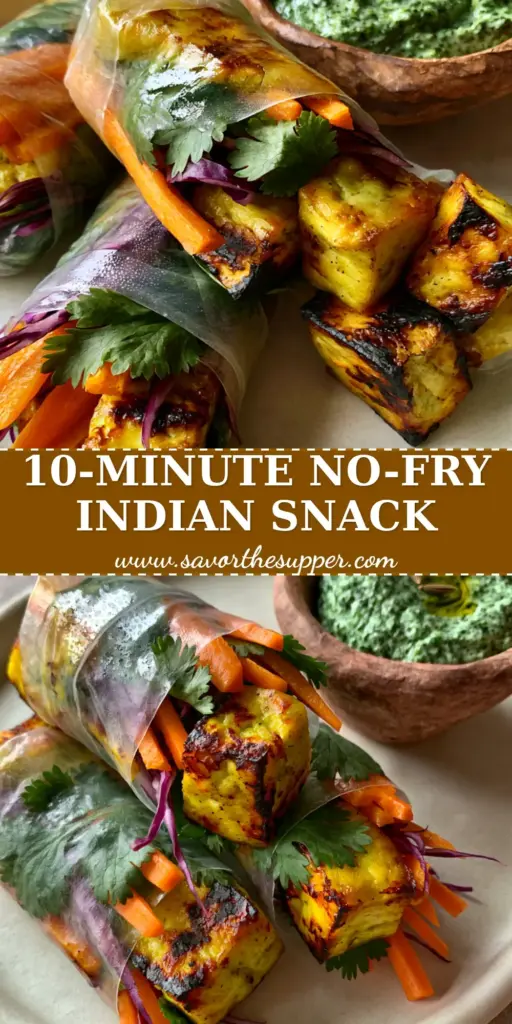
Imagine biting through a delicate, translucent wrapper into warm, golden-seared paneer cubes coated in smoky tikka spices, paired with the cooling crunch of julienned carrots and cucumber. These rolls aren’t just a meal; they are a visual masterpiece, showcasing bright purples, oranges, and greens through a clear, glistening skin.
By marrying the technique of a traditional spring roll with the flavor profile of authentic Indian food (coming soon), we create a dish that is high in protein and fiber. Whether you are hosting a summer party or looking for healthy adult lunchable ideas, these rolls offer a sophisticated twist on fusion dining.
Why You Will Love These Fusion Paneer Rolls
- Textural Harmony: Experience the contrast between the soft, chewy rice paper, the firm seared paneer, and the snap of raw, julienned vegetables.
- Visual Brilliance: The translucent wraps act as a window to the vibrant colors of shredded purple cabbage and emerald-green cilantro.
- Bold Spice Profile: Traditional tikka spices provide a warm, smoky depth that is perfectly balanced by a cooling neon-green mint chutney.
- Naturally Gluten-Free: Using rice paper makes this an accessible option for those avoiding wheat without sacrificing any flavor.
Essential Ingredients for Indian Rice Paper Rolls
Translucent Rice Paper Wraps: You will need 8-10 large circular rice paper sheets. These provide the structural integrity and the signature “window” into the colorful fillings.
Paneer Cubes: 7 oz (200g) of firm paneer, cut into 1/2-inch cubes. Paneer is the “steak” of the vegetarian world, capable of holding a deep, golden sear without melting.
Tikka Spice Blend: A mix of 1 tsp (5g) Kashmiri chili powder, 1/2 tsp (2.5g) turmeric, and 1 tsp (5g) garam masala. This creates the charred, aromatic exterior seen in the visual prompt.
Fresh Vegetable Medley: 1 cup (150g) julienned carrots, 1 cup (150g) cucumber matchsticks, and 1 cup (70g) shredded purple cabbage. These provide the essential crunch and structural volume inside the roll.
Fresh Cilantro Sprigs: Whole leaves are used for maximum visual impact. They should be visible through the paper as bright emerald bursts.
Mint Chutney Dipping Sauce: A thick, textured blend of fresh mint, cilantro, green chili, and lemon juice. This neon-green sauce is the essential acidic counterpoint to the spiced paneer.
Invisible Essentials: 2 tbsp (30ml) neutral oil for searing and a generous pinch of sea salt. These ensure the paneer achieves that specific “charred edge” texture.
Professional Tools for Perfect Rolling
To achieve the “plump” look described in our visual guide, you will need a large, shallow bowl of warm water for dipping the rice paper. A heavy-bottomed non-stick skillet is vital for searing the paneer to a deep golden brown without sticking.
Using a high-quality julienne peeler or a sharp chef’s knife is non-negotiable for the vegetable prep. Uniform vegetable matchsticks ensure the rolls wrap tightly and look professional on the plate.
The Culinary Blueprint: Step-by-Step Instructions
Perfecting the Golden-Seared Tikka Paneer
Begin by tossing your paneer cubes in a small bowl with the tikka spices, salt, and 1 tsp (5ml) of oil. Ensure every cube is thoroughly coated in the red-orange spice mixture for that authentic street-food look.
Heat 1 tbsp (15ml) of oil in your skillet over medium-high heat until it shimmers. Add the paneer in a single layer, allowing it to sit undisturbed for 2 minutes to develop a deep, golden-brown crust.
Flip the cubes and sear the other sides until they show those characteristic charred edges. Remove from the heat and let them cool slightly so they don’t melt the delicate rice paper during assembly.
Prepping the Vibrant Vegetable Fillings
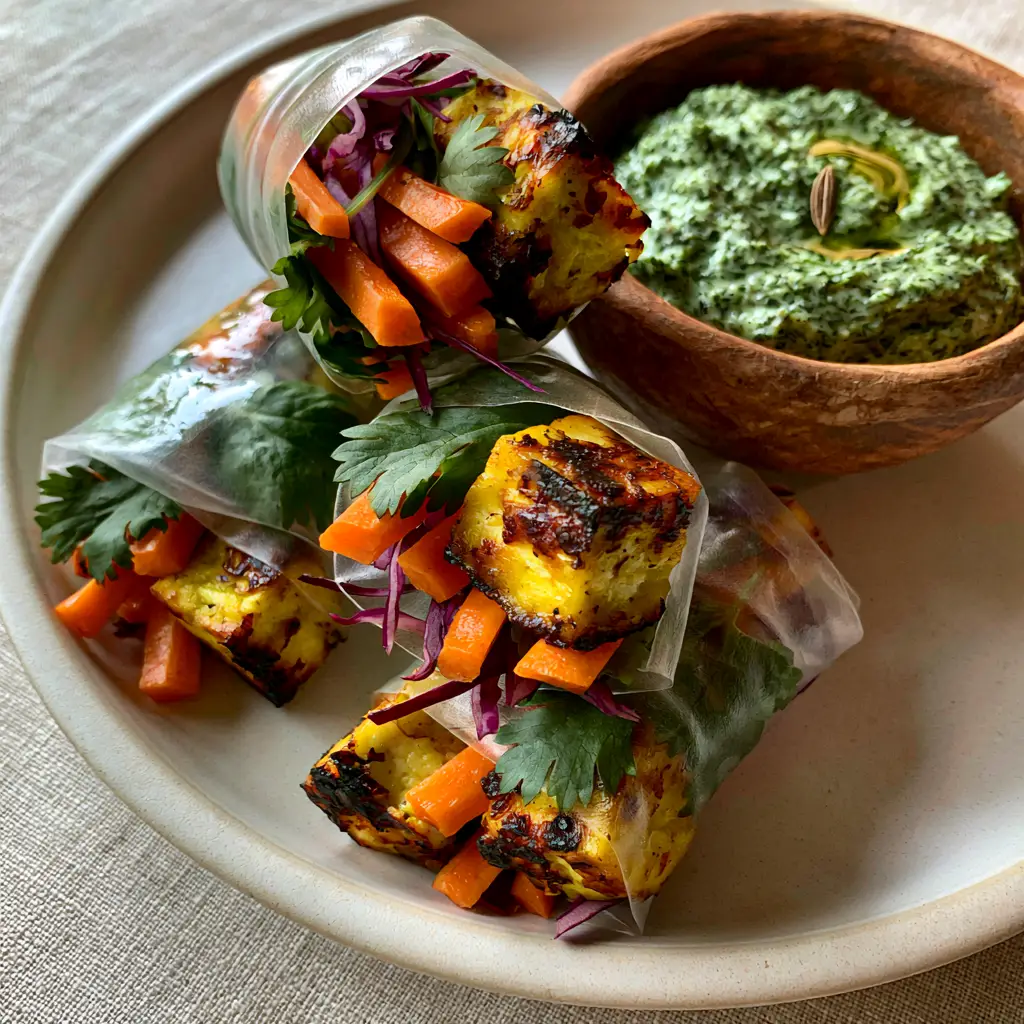
While the paneer cools, prepare your vegetables into uniform matchsticks about 3 inches long. This consistency is the secret to a “plump” and stable Indian rice paper roll.
Wash the cilantro and pick the largest, brightest leaves, keeping them whole for the best visual appeal. Shred the purple cabbage thinly so it provides color without creating bulky lumps in the wrap.
The Art of the Translucent Wrap
Fill a wide dish with warm water (not boiling, or the paper will become too fragile). Submerge one sheet of rice paper for about 10-15 seconds until it is pliable but still has a slight structure.
Lay the damp sheet flat on a clean, damp cutting board or a linen surface. In the bottom third of the circle, place 3-4 cubes of paneer, followed by a handful of carrots, cucumber, and cabbage.
Top the vegetables with 3-4 whole cilantro leaves, ensuring the leaves face outward. Fold the bottom edge over the filling, tuck in the sides, and roll tightly upward like a burrito.
Expert Tips for Success
- Avoid Over-Soaking: If the rice paper feels like wet tissue, you’ve soaked it too long; it should still feel slightly firm when you pull it from the water.
- The Double Wrap Trick: If your rolls are tearing because of the sharp paneer edges, try double-wrapping them or using two sheets for a sturdier finish.
- Squeeze the Veggies: Pat your cucumber matchsticks dry with a paper towel to prevent excess moisture from making the rolls soggy.
- Chaat Masala Garnish: Sprinkle a pinch of chaat masala over the rolls just before serving to add that signature tangy, salty zing found in Indian snacks.
Storage, Reheating, and Make-Ahead Advice
Indian rice paper rolls are best enjoyed immediately while the paper is soft and the paneer is slightly warm. However, if you need to store them, wrap each roll individually in plastic wrap to prevent them from sticking together.
They will keep in the refrigerator for up to 24 hours. Do not freeze these rolls, as the rice paper will lose its texture and the vegetables will become mushy upon thawing.
What to Serve With This Fusion Dish
Pair these rolls with a side of chilled cucumber salad for an extra refreshing crunch. If you want a more substantial meal, serve them alongside a bowl of fragrant coconut rice (coming soon) or use them as an appetizer for a main course of spicy chicken rice.
For a unique texture profile, you can also experiment with the techniques used in air fryer rice paper rolls to give the exterior a crispy, bubbly finish.
Frequently Asked Questions
While they are best fresh, you can make them up to 4 hours ahead if you wrap them individually in plastic wrap and store them under a damp paper towel to prevent the rice paper from drying out.
Absolutely! Extra-firm tofu can be pressed, cubed, and seared with the same tikka spices for a delicious vegan version of these Indian rice paper rolls.
Avoid over-soaking the paper in water; it should still be slightly firm when you remove it. Also, ensure your paneer cubes don’t have extremely sharp edges and your vegetables are julienned thinly.
Yes, rice paper is naturally gluten-free as it is made from rice flour and water. Always check your spice blends (like garam masala) to ensure they have no wheat-based anti-caking agents.
Use a non-stick skillet over medium-high heat with a small amount of oil. Let the paneer sit undisturbed for at least 2 minutes to develop the golden, charred crust seen in the photos.
The Ultimate Indian Rice Paper Roll Recipe
Indian Rice Paper Rolls with Seared Paneer Tikka
Ingredients
Equipment
Method
- Toss paneer cubes with chili powder, turmeric, garam masala, and salt until evenly coated.
- Heat oil in a skillet and sear paneer for 2-3 minutes per side until golden with charred edges.
- Dip one rice paper sheet in warm water for 10-15 seconds until pliable.
- Layer paneer, carrots, cucumber, cabbage, and cilantro. Fold the bottom up and roll tightly into a plump cylinder.
Notes
Use a damp cutting board to prevent sticking while rolling.
Closing & Call to Action
These Indian rice paper rolls are a testament to the beauty of fusion cooking, bringing together the best of Southeast Asian technique and Indian spice. They are light, nourishing, and visually stunning—perfect for your next gathering or a healthy meal prep session.
If you enjoyed this recipe, please leave a comment below and let us know how your paneer tikka turned out! Don’t forget to share your creations and follow us on Pinterest for more culinary inspiration.