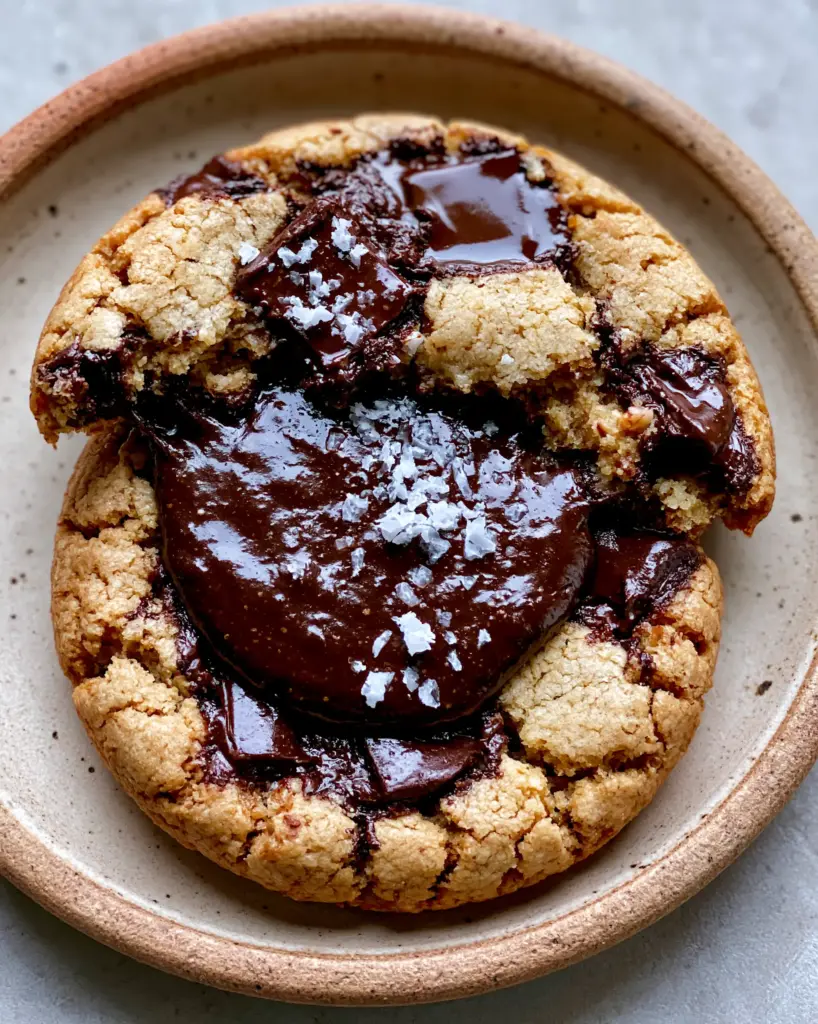
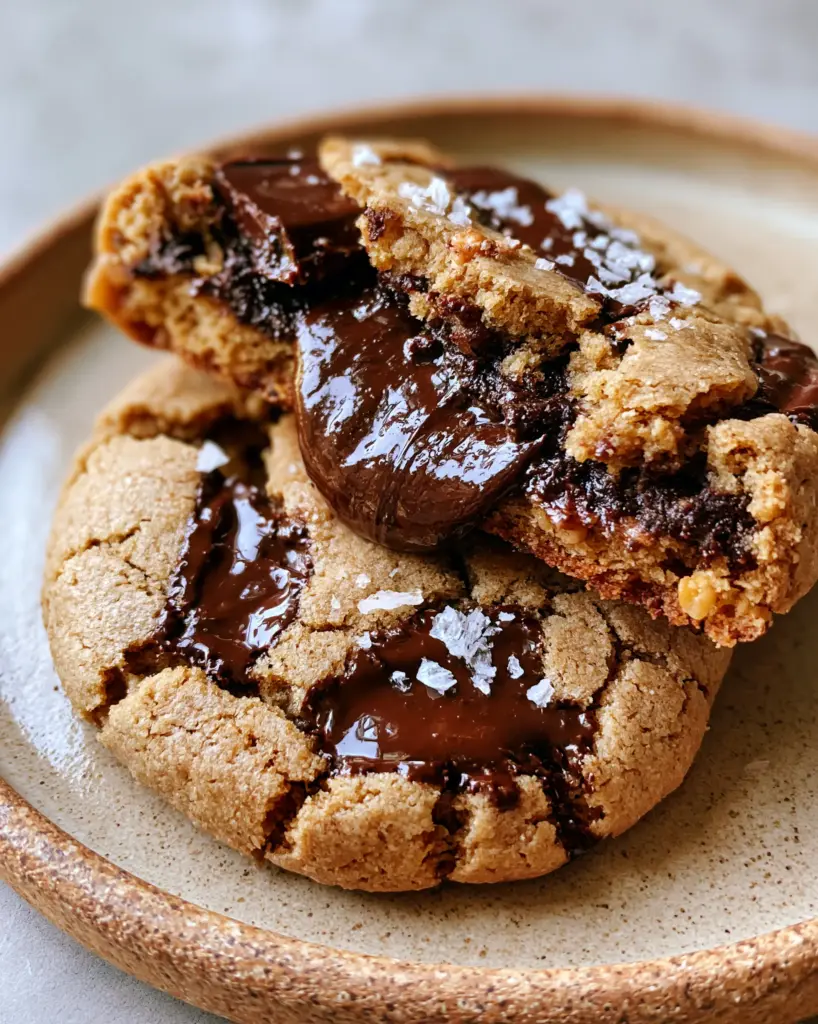
Imagine breaking into a warm, freshly baked cookie only to discover a thick, molten, glossy dark brown chocolate hazelnut center slowly oozing out. These chocolate stuffed cookies are the ultimate indulgence for any serious cocoa lover.
The contrast between the soft chewy texture of the dough and the liquid gold in the center creates a gourmet experience right in your kitchen. We have meticulously tested this recipe to ensure a golden-brown cracked surface that looks as professional as it tastes.
By using dark chocolate chunks instead of standard chips, you get those iconic pools of melted chocolate that perfectly complement the hazelnut filling. A final pinch of flaky sea salt crystals elevates the sweetness, making every bite a complex symphony of flavors.
Why These Molten Center Masterpieces Are a Total Game-Changer
- The Ultimate Texture Play: You get a golden-brown baked cookie crust on the outside with a ridiculously soft, chewy interior.
- The Secret Ooze: Unlike standard treats, these feature a molten hazelnut-cocoa spread that stays liquid even as the cookie cools slightly.
- Gourmet Visuals: The cracked surface studded with melted dark chocolate chunks makes these look like they came from a high-end boutique bakery.
- Balanced Sweetness: The addition of flaky sea salt crystals cuts through the richness of the dark chocolate for a sophisticated finish.
The Essential Pantry Lineup for Gourmet Stuffed Cookies
To achieve the forensic visual accuracy of a bakery-style cookie, every ingredient serves a specific structural and aesthetic purpose. We aren’t just making a snack; we are engineering a dessert experience.
The Foundational Ingredients
Unsalted Butter (1 cup / 227g): We use softened butter to ensure the dough has enough fat to create that tender, melt-in-your-mouth crumb. Make sure it is at room temperature but not greasy.
Brown Sugar (1 cup / 200g) & Granulated Sugar (1/2 cup / 100g): The high ratio of brown sugar is what provides the deep caramel notes and the soft chewy texture. The white sugar helps achieve those crispy, golden-brown edges.
All-Purpose Flour (2 ¼ cups / 280g): This provides the necessary structure to hold the heavy molten center without the cookie collapsing in the oven. Measure by weight for the most consistent results.
The Signature Mix-Ins and Fillings
Hazelnut-Cocoa Spread (1/2 cup / 150g): This is the star of the show, providing the glossy dark brown center that oozes when the cookie is pulled apart. We freeze this in dollops to make the stuffing process effortless.
Dark Chocolate Chunks (1 ½ cups / 250g): Chunks contain less stabilizers than chips, allowing them to melt into “pools” of chocolate. This is essential for the “cracked surface” visual described in our blueprint.
Flaky Sea Salt (to taste): Large, white crystals of salt provide a visual pop against the dark chocolate and a necessary hit of salinity. Never skip this if you want a professional-grade result.
Professional Kitchen Gear for the Perfect Bake
Having the right tools ensures that your chocolate stuffed cookies don’t leak their precious cargo onto the baking sheet. A few specific items will make your life much easier.
- Small Cookie Scoop: This helps in portioning the dough exactly so the hazelnut center is perfectly encased in the middle.
- Silicone Baking Mat or Parchment Paper: Essential for preventing the bottom of the cookies from browning too quickly before the center warms up.
- Wire Cooling Rack: Allowing air to circulate under the cookies prevents the “bottom-sog” and keeps that golden-brown crust intact.
Master the Art: A Step-by-Step Guide to the Perfect Ooze
Making chocolate stuffed cookies requires a bit of patience, specifically regarding temperature control. Follow these steps to ensure your cookies look exactly like the handheld smartphone photo in our visual prompt.
Step 1: Prepping the Liquid Gold Center
Line a small tray with parchment paper and drop 12-14 individual teaspoons (15g each) of hazelnut-cocoa spread onto it. Place this tray in the freezer for at least 30 minutes until the dollops are firm and can be handled without melting.
Step 2: Crafting the Signature Cookie Base
In a large bowl, cream together your softened butter and both sugars until the mixture is light and fluffy. This should take about 3 minutes of high-speed mixing to incorporate enough air for the “soft chewy texture.”
Add in two large eggs and 2 tsp (10ml) of pure vanilla extract, beating until well combined. Gradually fold in your dry ingredients (flour, 1 tsp baking soda, and 1/2 tsp salt) until a soft dough forms.
Step 3: Folding in the Dark Chocolate Chunks
Gently stir in the dark chocolate chunks by hand. Ensure they are evenly distributed so that every cookie has those beautiful “pools” of melted chocolate on the surface once baked.
Step 4: The Assembly and Stuffing
Take about 2 tablespoons (50g) of dough and flatten it into a disc in your palm. Place one frozen hazelnut dollop in the center and fold the edges of the dough over it, pinching to seal completely.
Roll the dough into a smooth ball, ensuring no hazelnut spread is visible. If the spread starts to soften, pop the dough balls into the fridge for 10 minutes before baking to prevent spreading.
Step 5: Baking for that Golden Cracked Finish
Bake at 350°F (175°C) for 10-12 minutes. You are looking for a specific visual cue: the edges should be a deep golden-brown, while the center still looks slightly underbaked and “cracked.”
Pro-Level Secrets for Cookie Success
- The Freeze is Mandatory: If you don’t freeze the hazelnut dollops, they will mix into the dough during assembly, and you’ll lose the molten center effect.
- Don’t Overbake: The “ooze” depends on a slightly soft interior. If the cookie is hard all the way through, the center will lose its glossy, liquid consistency.
- The “Slam” Technique: For extra ripples and cracks, gently tap the baking sheet against the oven rack halfway through baking.
- Chunk Placement: Press a few extra dark chocolate chunks onto the top of the dough balls right before they go in the oven for that “studded” look.
How to Keep Your Cookies Fresh (If They Last That Long)
While these are best served warm to maximize the molten center, you can store them in an airtight container at room temperature for up to 3 days. To regain that “freshly baked” feel, microwave a cookie for 10-15 seconds before eating.
You can also freeze the unbaked, stuffed dough balls for up to 3 months. Simply bake them from frozen, adding an extra 2 minutes to the total baking time.
Ultimate Dessert Pairings and Serving Ideas
If you are looking to build a full dessert spread, these chocolate stuffed cookies are the perfect anchor. They pair beautifully with other classic treats for a varied texture experience.
Consider serving these alongside some soft-batch mini M&M chocolate chip cookies for the kids or a slice of chocolate zucchini bread for those who want a double dose of cocoa.
For a festive party platter, these look stunning next to birthday cake cookies or even a bowl of peanut butter chocolate Frito munch for that salty-sweet contrast.
If you’re serving these after a hearty family dinner, like a baked zucchini parmesan casserole, a cold glass of milk is the only accompaniment you truly need.
Frequently Asked Questions About Chocolate Stuffed Cookies
Yes, but chunks provide those large ‘pools’ of melted chocolate seen in professional photos. Chips have more stabilizers and hold their shape, which changes the visual texture.
The cracked surface comes from a high brown sugar ratio and the ‘slam’ technique. Tapping the pan halfway through baking creates ripples in the dough as it sets.
At least 30 minutes. If they are still soft, they will be difficult to handle and will likely melt too quickly inside the oven, leading to a flatter cookie.
Microwave for 10-15 seconds. This is just enough time to soften the hazelnut-cocoa spread back into a glossy, liquid state without overcooking the dough.
Leaking usually happens if the hazelnut dollops weren’t frozen solid or if the dough wasn’t sealed tightly around the filling. Ensure there are no visible gaps in the dough before baking.
The Ultimate Chocolate Stuffed Cookies Recipe Card
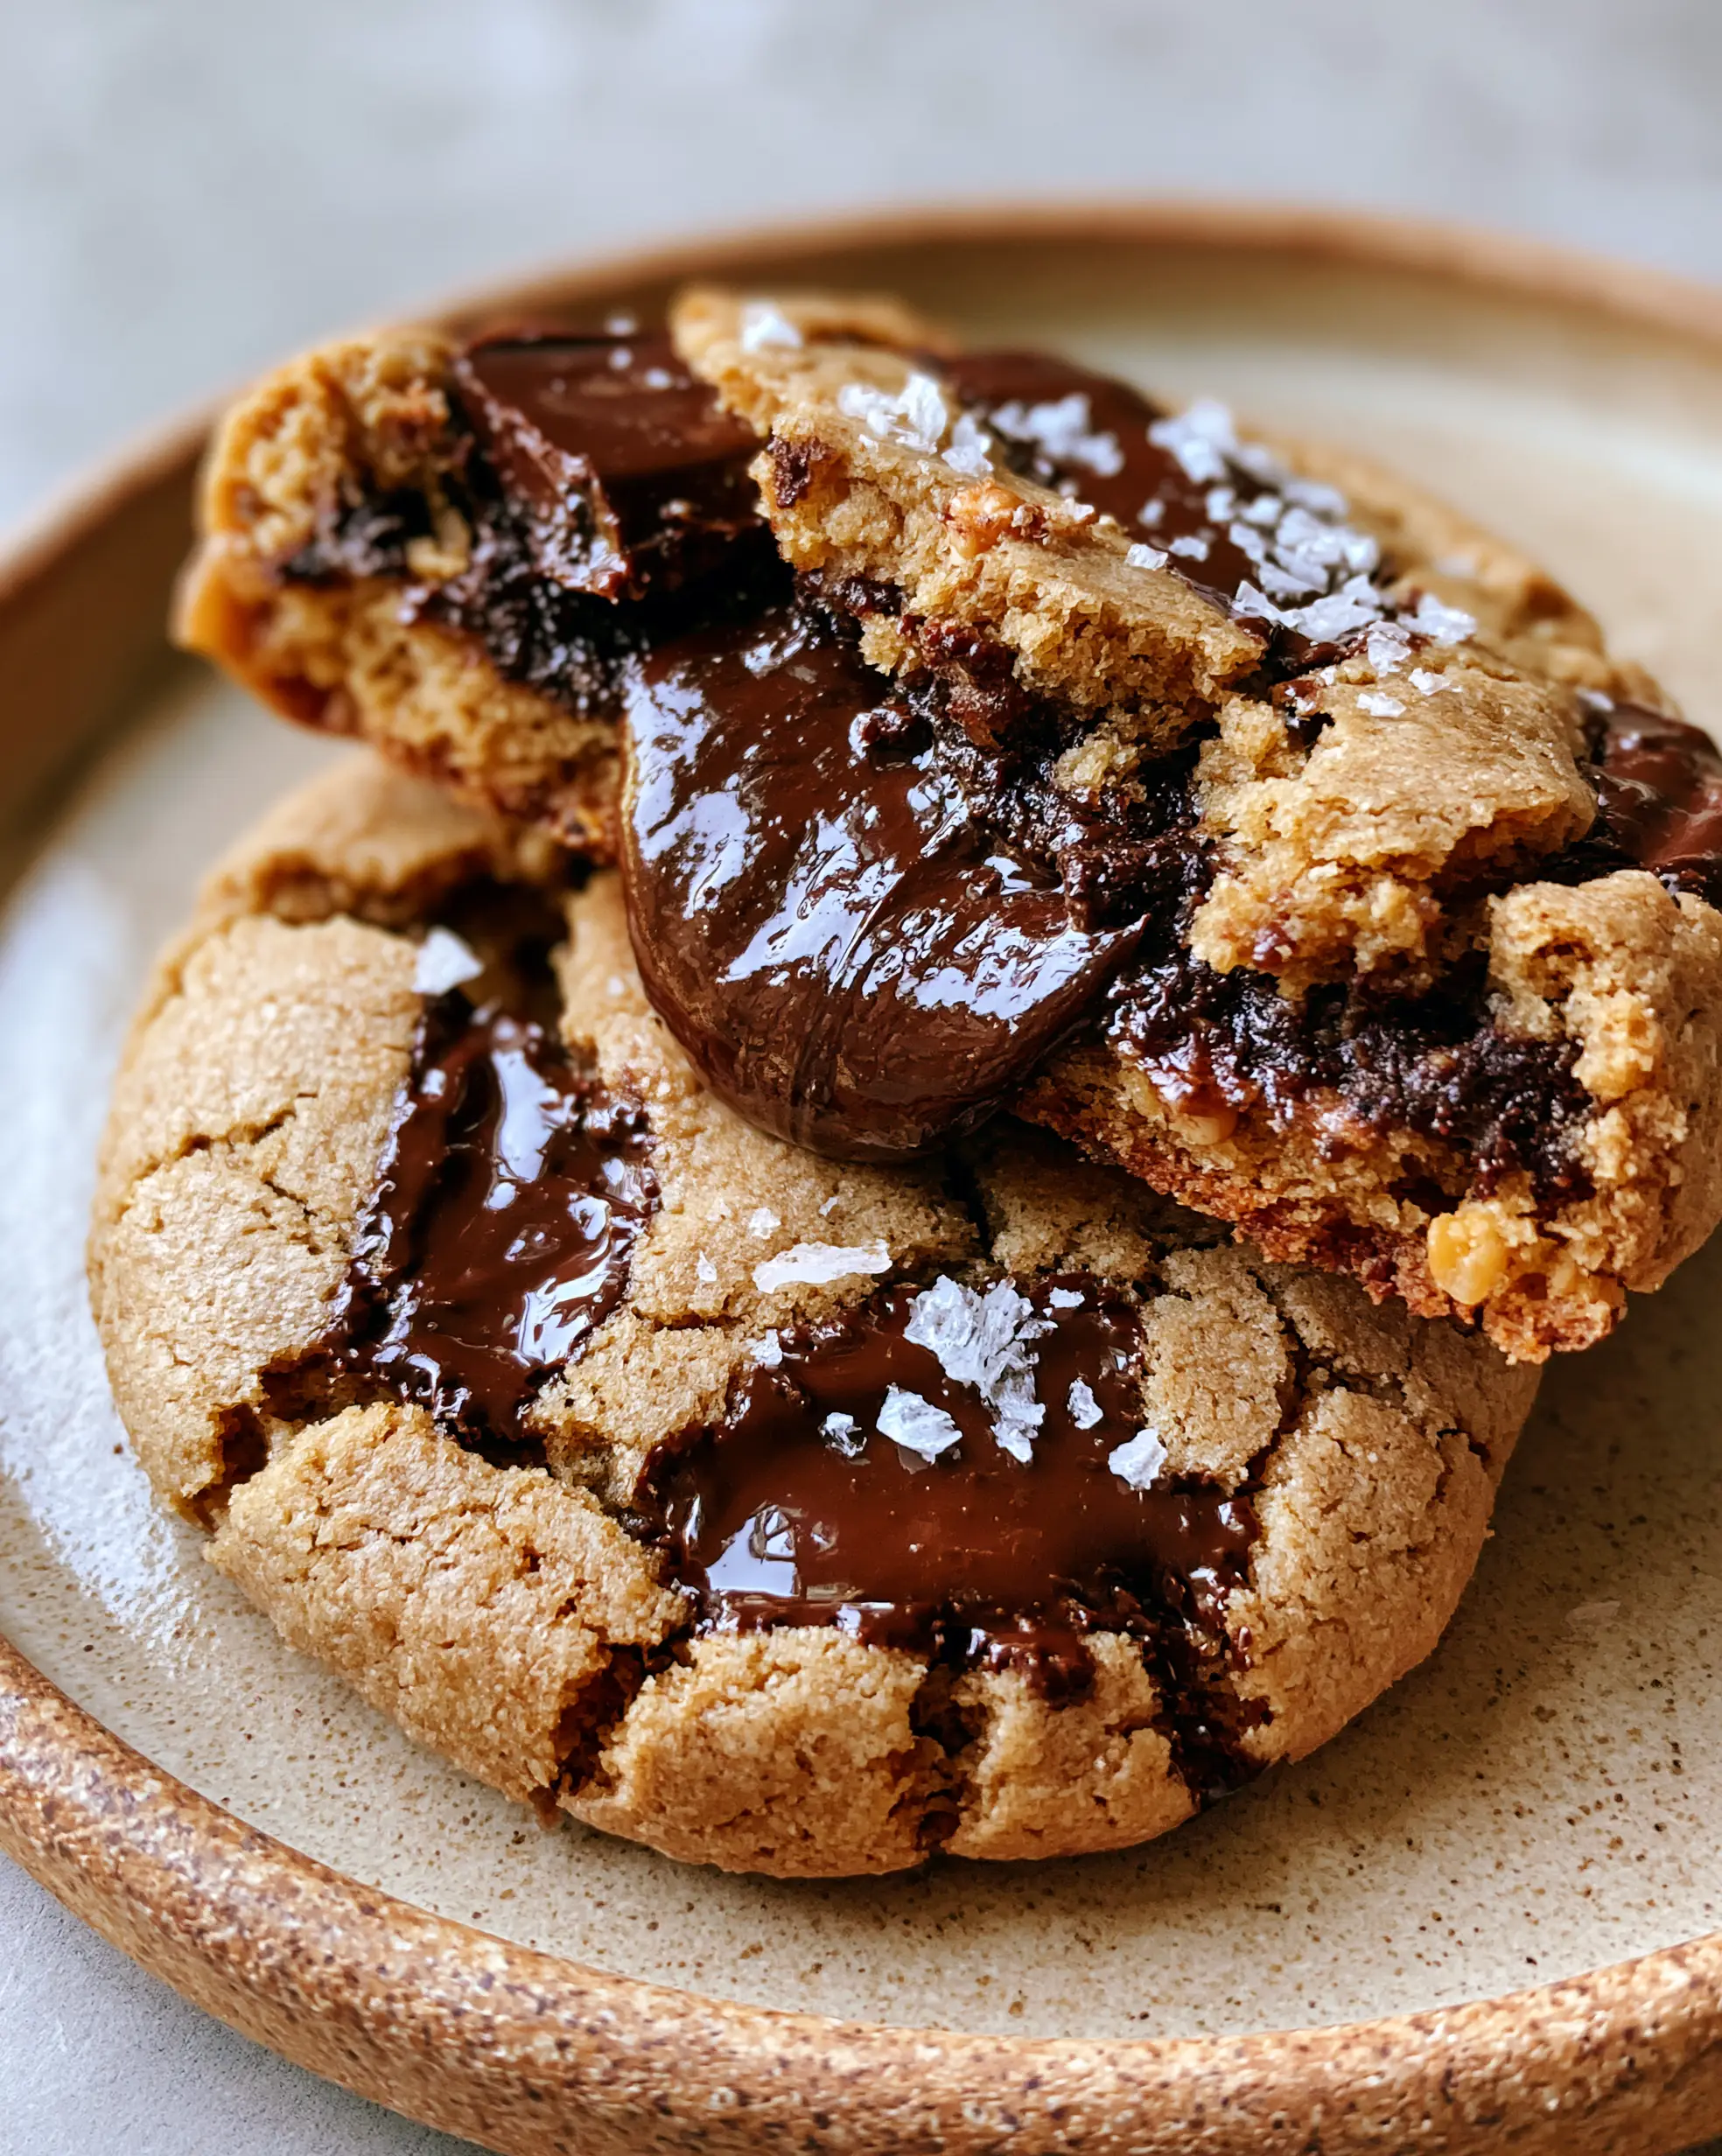
Chocolate Stuffed Cookies with Molten Hazelnut Centers
Ingredients
Equipment
Method
- Scoop 12-14 teaspoons of hazelnut spread onto a parchment-lined tray and freeze for 30 minutes until solid.
- Cream the softened butter with brown and white sugars until light and fluffy. Add eggs and vanilla.
- Gradually mix in the flour, baking soda, and fine salt. Fold in the dark chocolate chunks by hand.
- Flatten 2 tbsp of dough, place a frozen hazelnut dollop in the center, and seal the dough around it completely.
- Bake at 350°F (175°C) for 10-12 minutes until edges are golden-brown and surface is cracked.
- Immediately sprinkle with flaky sea salt while the chocolate pools are still melted.
Notes
Use high-quality dark chocolate chunks for the best 'melted pool' visual effect.

Closing & Call to Action
These chocolate stuffed cookies are more than just a dessert; they are a culinary event. Whether you are baking them for a special occasion or just a cozy weekend treat, the sight of that molten center is guaranteed to impress.
If you loved this recipe, please leave a comment below and let us know how your “ooze” turned out! Don’t forget to follow us and share your bakes on Pinterest to help other home cooks find their new favorite cookie.